Creating a Cavity Extraction

You can create a cavity extraction feature placed into a new body, and referencing an existing body (the source body). The cavity feature creates a protected volume.

The cavity extraction feature produces geometry useful in defining a cavity plate to mold the source Body. The output is associative, meaning if the source body changes, the cavity extraction geometry will automatically change.

The output geometry includes the cavity, added, and protected volumes, as well as the unshelled portions of the shellable volumes. Features can be excluded, and an optional extraction properties feature can be used to omit protected volumes.

Note: Depending on your role, you may not have access to this functionality.


Before you begin: Open a 3D shape representation.
  1. From the Manufacture section of the action bar, click Cavity Extraction .
  2. In the Source body box of the Protected Extracted Cavity.x dialog box, select a source body.


  3. From the Extract behavior list in which all the behaviors of the selected body are listed, select the required behavior.
  4. Click OK.
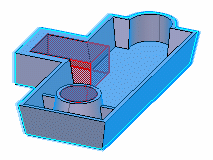
    The cavity extraction feature is created. The Cavity Body.x node is added to the tree
  5. From the Create section of the action bar, click External Feature .
  6. In the Profile/Surface box, select or create a sketch. This is to hold the cavity.
  7. In the First Limit tab, specify the length.


  8. Click OK .
  9. Right-click the body and select Hide/Show to view the cavity better.
    Important: When you create a Cavity Extraction, selecting a body as source body on a product which has multiple added/removed bodies or assembled bodies, the extraction will be generated on the body in the first position of the selected body.