-
From the Images section of the action bar, tap Image Chooser
 .
.
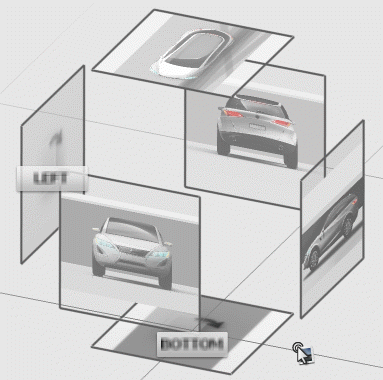
A box representing the 2D canonical views appears.
Note:
You can use an axis system to initialize the box.
-
Select the image you want to use from your computer.
-
Drag the image onto a plane of the box.
Note:
You can also select the image by double-tapping a plane
and search through a folder.
-
Do the same for the other planes.
The dimensions of the image are calculated as a ratio of the dimensions of the
plane.

-
To modify the resolution of the image, press the pen button bound to the
right-click of the pointer and tap the image edge.
The Image Resolution panel appears and
displays the possible available resolutions.
- To modify the opacity of the
image, drag the slider or edit the value.
-
From the standard area of the action bar, tap Transform
 .
.
- Optional:
Copy, cut, paste, or delete the image as appropriate.
You can now use this image as a
drawing support for sketching or tracing.