Deforming The Surface Limits | |||||
|
| ||||
- Click Top View
 in the View section of the action bar.You can position the symmetry plane according to the current plane.
- Select the surface you just created and click
Control Points
 The Control Points dialog box appears.
 - Double-click Symmetry
 to lock the functionality.
 - Choose the following deformation options from the dialog
box:
- Support: Mesh Lines

- Diffusion Law: Convex Law

- Support: Mesh Lines
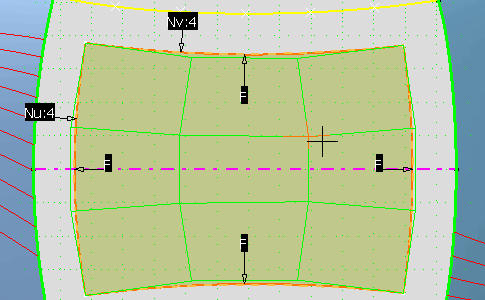
- Use the handles on one of the corner control points
to bring it closer to the orange reference curve.The mesh line takes the global shape of the reference curve, even though it does not yet match it perfectly.
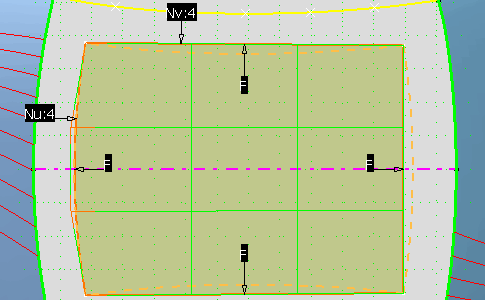
- In the Control Points dialog box, select new
options:
- Diffusion Law: Constant Law

- Diffusion Law: Constant Law
- Select one of the side mesh lines and bring it closer to
the orange reference curve until the patch corner reaches the curve's end
points.You need to iterate on the front and rear mesh lines, using the same options to reach a satisfying level of superimposition.

For further tuning you need to zoom in and move single control points. - Move each side control point to superimpose the patch
boundaries and reference curves.You need to move them along the Y direction only.
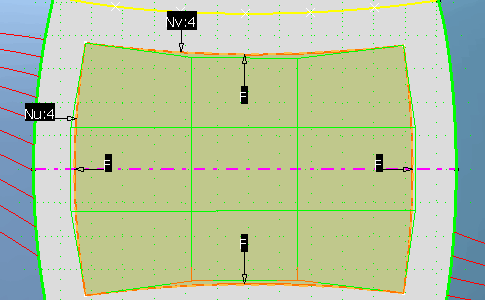
- Move the inner control points 2 by 2, using the Shift
key, to move them closer to the patch center.The patch now has the shape given by the reference curves.