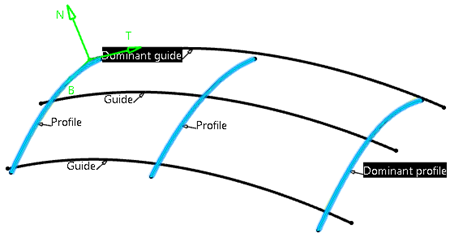
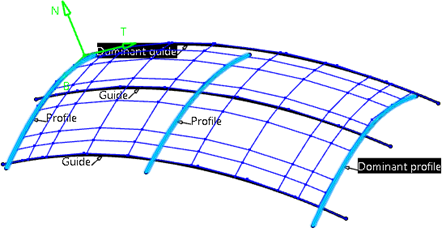
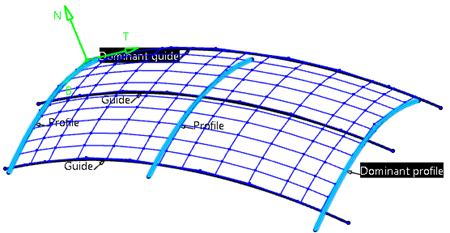
Creating a Net Surface | |||||
|
| ||||
-
From the Creation section of the action bar, click Net Surface
 .
.
- Successively select one or more guide curves.
-
Click the profiles text in the dialog box and
successively select the profile curves.
Note: All the curves selected as either a guide or a profile must generate the flow of the surface (in the U or V direction but not both). Thus, two curves selected as a guide, for example, must not be perpendicular to each other (1 in U direction and 1 in V direction).

The dialog box updates with the number of guides and profiles selected.
Note: The guide and profile you select first is identified as being dominant, specifying that the surface segmentation is based on these specific curves segmentation. Click on a Guide or Profile tag to let this curve become the dominant curve. - Optional: In the Net Surface dialog box, click <<Settings to access advanced settings.
- Optional:
Click Copy (d) mesh on surface, then click
Apply.
Note: In the App Options panel, select Furtive Display
 to be
better able to analyze the result.
to be
better able to analyze the result.-
Copy (d) mesh on surface selected: The parameterization of the dominant guide curve and the dominant profile curve is copied to the entire Net surface.

-
Copy (d) mesh on surface cleared: The parameterization of the other selected curves is copied to the Net surface.

-
- Click Selection>> , then Display>>, and information to show or hide the tags.
-
Click moving frame to show or hide the moving frame
symbol.
The moving frame defines the profile's position along the dominant guiding curve.
-
To edit the moving frame, do one of the following:
- In the work area, click the moving frame to change its type. You can right-click the moving frame to see all the available types.
- Shift + click the moving frame to switch to the previous type.
- Right-click the moving frame's center to display its context menu.
- Drag a handle at the moving frame's center to move it along the dominant guide.
- Click Apply, then click OK.