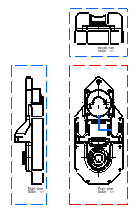
Generate a Drawing Using Add  > Content
You can create a new drawing using the Add ![]() > Content command.
> Content command.
-
In the top bar, select Add
 > Content or press Ctrl+N.
Tip: You can also right-click an assembly or sub-assembly and select Insert > Drawing to create a drawing that can be automatically inserted in the current assembly. In this case, an empty drawing is automatically inserted as a reusable representation under the active product, and it is not set in editing mode. The New Content dialog box appears to list the Favorites and the Most Recently Used objects. -
Right-click Drawing in the list and select
Set attributes at creation.
This allows you to define the drawing parameters before its creation. However, if you do not select this option, the drawing is initialized with the default parameters, (these parameters are: standard, sheet style, sheet orientation, generative view configuration - if applicable, product attachment).
-
Click Drawing.
The Drafting app is loaded and an empty drawing representation is created. The first empty sheet, Sheet.1 is created in the tree. The drawing is inserted in the product.
However, if you had selected Set attributes at creation in the context menu of Drawing, then, the Drawing dialog box appears allowing you to define the drawing parameters.
-
In the Drawing tab, give a title for your drawing,
and a description. By default, a name drwXXX (where
XXX is a number) is specified. For more information about the
Drawing tab and general representation attributes, see 3DEXPERIENCE Platform
User's Guide: Other Services: Add: Creating New Content.
Tip: Once you create the drawing representation, you can modify its name by right-clicking the drawing in the tree, and then selecting Properties. -
Select an appropriate range in the Design Range
list.
If the ranges of the drawing and that of the product/3D area parts are not matching, the Entry creation failed message appears and the drawing is not generated.
-
Select the Drawing Information tab.
This tab lets you define various information related to your drawing.
- Select a standard.
-
Select a sheet style. The Sheet Style section
displays the corresponding values for:
- Sheet format
- Paper size
- Global scale
-
Choose the orientation: Portrait or
Landscape.
The last selected standard, sheet style, and orientation are used by default when creating a drawing.
-
Select whether you want to create an empty sheet or a sheet prefilled with
certain views from your product:
- All views
- Front, bottom, and right views
- Front, top and left views
If the ranges of the drawing and that of the product/3D area parts are not matching, the message Current range does not allow view generation is displayed in the select views list.
-
Select the Insert drawing in [open product's name]
option to insert the drawing in the current product.
By default, this option is selected.
-
Click OK.
The View Creation Wizard dialog box appears. It disappears as soon as the view creation process is completed.

Important: You can cancel the creation of multiple views during the process by clicking Cancel. This stops the creation of views that are not yet computed. However, the view that is being computed when you click Cancel is fully computed. Therefore, clicking Cancel has no consequence when creating or updating a single view.
 is
visualized in the drawing editor window.
 is visualized in the drawing editor window.