- From the Tools section of the action bar, click Formula
 . .
The Formulas dialog box appears. You will now select, one after the other, the dimensions
to be constrained and then enter in the dialog box the formulas to be
used.
Here is the drawing we use in this scenario.
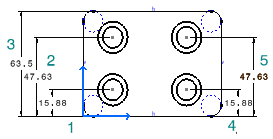
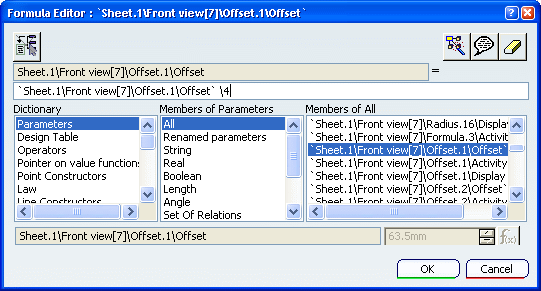
- Select a first dimension (1).
- Click Add Formula in the
Formulas dialog box.
- In the Formula Editor dialog box, select a second dimension (3)
and add "\4". Then, click OK.
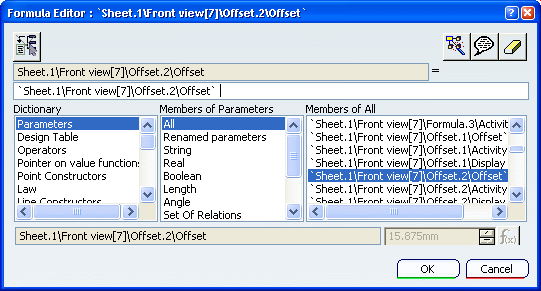
- Back in the Formulas dialog box, select a
first dimension (2).
- Click Add Formula.
- In the Formula Editor dialog box, select a second dimension (3)
and add "*3 /4". Then, click OK.
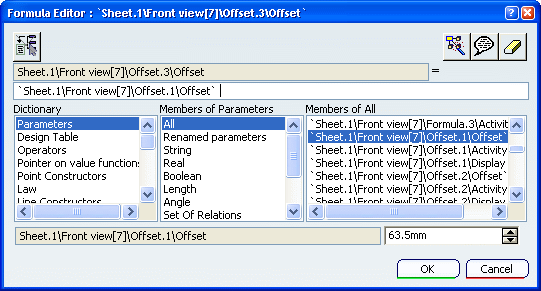
- Back in the Formulas dialog box, select a
first dimension (4).
- Click Add Formula.
- In the Formula Editor dialog box, select a second dimension (1)
and then, click OK.
- Back in the Formulas dialogs box, select
a first dimension (5).
- Click Add Formula.
- In the Formula Editor dialog box, select a second dimension (2)
and then, click OK.
- Back in the Formulas dialog box, click
OK.
Note that the tree is modified accordingly.
- Double-click the dimension to be set as driving dimension
(3).
The Dimension Value dialog box appears.
- If needed, activate the Drive geometry.
- Enter 100mm as dimension new length and press
OK.
All the dimensions you previously constrained using
formulas are automatically updated.

|