You can add bookmarks to your map. A bookmark does not only represent a point of view,
but also a context such as displayed elements, highlighted elements, and so on. This can be
very useful when creating different versions of a same project, for example.
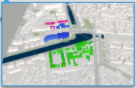
Navigate in your urban environment to choose the appropriate view.
From the Create section of the action bar, click Create
Bookmark.
The following items are created in the tree:
A My Bookmarks folder.
The new bookmark that is named My Bookmark 1 by default.
In the tree, move your mouse over the bookmark name to display a
thumbnail of the generated view.
Note:
By default, bookmarks are generated as temporary
items.
Optional:
Select the bookmark then, from the standard area of the action bar, click Properties, and enter the name of your choice for in the
name box.
Tip:
You can modify any of these default names by double-click a
name, then entering the new name.
To modify a bookmark, make the appropriate changes to the map view, right-click
the bookmark in the tree, and then select Update
Bookmark.
The bookmark is instantly modified and the changes are reflected in the
thumbnail.
Original bookmark Modified bookmark
Optional:
To display only one bookmark at a time, select the appropriate bookmark folder,
click Properties from the standard area of the action bar, and then select the
exclusive option in the Attributes area of the
Properties panel.
 .
The following items are created in the tree:
.
The following items are created in the tree: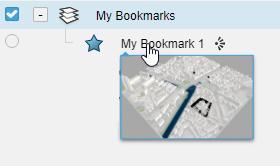
 , and enter the name of your choice for in the
name box.
, and enter the name of your choice for in the
name box.