-
From the Scene Manager panel, click either:
- Capture Into a New Scene
 to create a
snapshot of the current state of the experience in a new scene. If dressups have been
created, they are captured as well. to create a
snapshot of the current state of the experience in a new scene. If dressups have been
created, they are captured as well.
- Create Empty Scene
 to create a
snapshot in a new scene but without any dressup. to create a
snapshot in a new scene but without any dressup.
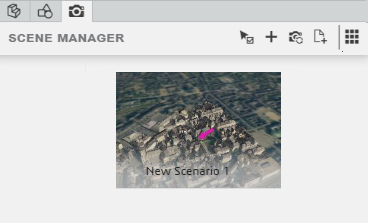
A slide (that is, a snapshot) of the current state of the viewer is created.
This slide contains a list of actors, their properties and visibility status. Each slide
is identified by a thumbnail.  -
Repeat this step as many times as necessary to create additional scenes.
-
In the viewport, change the view, and then click Update Camera
Position
 . .
The camera position in the current scene is updated accordingly.
-
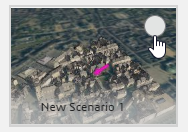
Click Switch to Edit Mode
 , and then
click the white spot in the upper right part of the thumbnail. , and then
click the white spot in the upper right part of the thumbnail.
-
You can then:
- Make some changes to the actors (remove, add, or modify some properties) then
click Replace Scene
 : the scene is updated with the current changes. : the scene is updated with the current changes.
- Edit properties in the Properties panel. For instance, you
can change the scene name or its visibility mode.
- Click Delete Selected Scenes
 to remove the
selected scenes. You can also press Shift to select multiple
scenes. Make sure the scene is not activated (blue area on the left), otherwise the
command has no effect. to remove the
selected scenes. You can also press Shift to select multiple
scenes. Make sure the scene is not activated (blue area on the left), otherwise the
command has no effect.
-
Click Exit Edit Mode
 . .
-
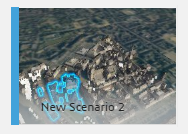
Click a scene to activate it.
The 3D is refreshed to display the selected experience state. The selected
scene is identified by a blue area on the left. Only one scene can be active at a
time. When a scene is active, any change you make to the actors (for iexample,
creation of a new dressup, or a change in some color properties) is automatically
captured in the scene.

- Optional:
If the visibility has been modified for some items in the scene, click
Restore Current Scenario Visibility
 from the Visibility section of the action
bar. from the Visibility section of the action
bar.
The original visibility is restored.
|
 to create a
snapshot of the current state of the experience in a new scene. If dressups have been
created, they are captured as well.
 to create a
snapshot in a new scene but without any dressup.
 .
The camera position in the current scene is updated accordingly.
 , and then
click the white spot in the upper right part of the thumbnail.

 : the scene is updated with the current changes.
  to remove the
selected scenes. You can also press Shift to select multiple
scenes. Make sure the scene is not activated (blue area on the left), otherwise the
command has no effect.
 .
.

 from the Visibility section of the action
bar.
The original visibility is restored.