Installing 3DEXPERIENCEGlobe | ||
| ||
-
Untar or unzip the media to create
3DEXPERIENCEGlobe.Linux64directory on Linux. - Change to the distribution directory; that is, 3DEXPERIENCEGlobe/1 on Linux.
- Specify how to start the installation on Linux:
Option Mode Description GUI mode Enter ./StartGUI.sh TUI mode Enter ./StartTUI.sh The procedure starts, and a dialog box displays a welcome message.
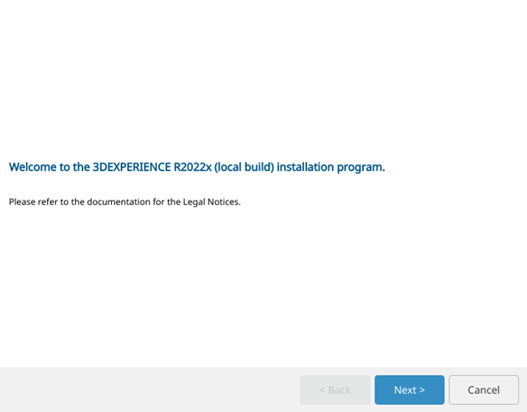
- Click Next.
-
Specify the installation directory.
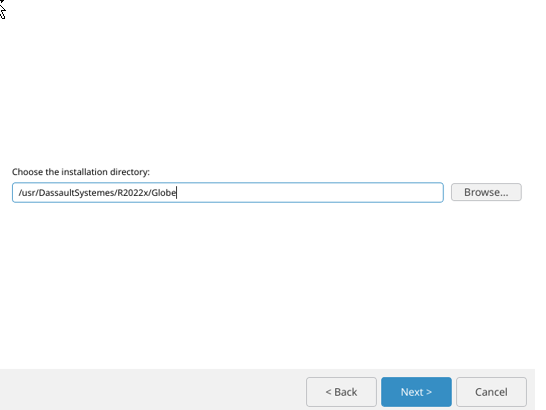
For example,
/usr/DassaultSystemes/R2022x/Globe/installon Linux. Alternatively, click Browse... and navigate to choose the directory. - Click Next.
-
Specify if you want to install the embedded Java, and then click
Next.
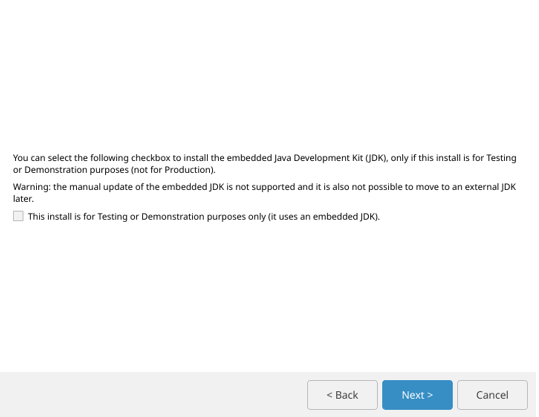
- If you did not select the Install the embedded JDK anywaycheck box, specify the Java Home path
- Click Next
- If you decided to use an external TomEE+, specify the path to your existing TomEE+ installation, and click Next
-
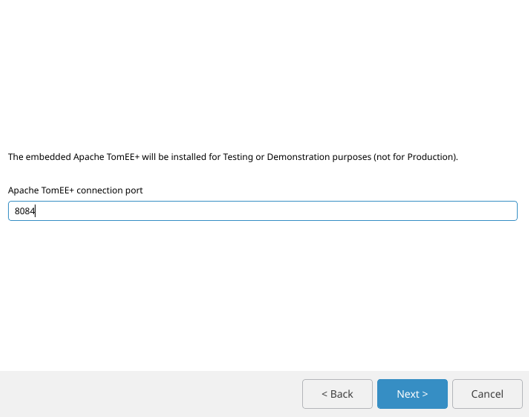
If you decided to install the embedded TomEE+, specify the TomEE+ connection
port number.
Choose a listening port number for TomEE+ to listen for HTTP requests. The default is 8080. The next two available ports are used for shutdown and AJP.
- Click Next.
-
Specify the previously configured, dedicated URL endpoints for the 3DEXPERIENCE platform services.
-
Verify the URLs match the following rules:
- The URLs must contain Fully Qualified Domain Names (FQDN).
- The URLs must start with
http(s)://(and not ftp or other). - 3DPassport, 3DDashboard, 3DSwym and 3DNotification must have a root URI if you install all the services on the same machine.
- 3DCompass must have a root URI.
- 3DSearch (federated search).
- 3DSpace has a root URI.
- If you install all services on the same machine, the ports must be different.
Important: Do not use uppercase characters in these URLs (standard form specified in RFC3986). - Optional:
Check the URLs you have entered against the example URLs. These are
default URLs when services are installed on different machines:
- 3DPassport service URL: the default is: https://3dpassport.mydomain:443/3dpassport
- 3DSearch service URL: specify the name of the federated search service; the default is: https://3dsearch.mydomain:443/federated
- 3DSpace service URL: the default is: https://3dspace.mydomain:443/3dspace
- 3DCompass service URL: the default
is:
https://3dspace.mydomain:443/3dspace - 3DSwym service URL: the default is https://3dswym.mydomain:443/3dswym
- 3DNotification service URL: the default
is:
https://3Dnotification.mydomain:443/3Dnotification
- Click Next.

-
Verify the URLs match the following rules:
-
If you are using embedded Java, specify the certificate location.
This directory contains the certificates to import into the JVM used by TomEE+, by default
/tmp/DassaultSystemeson Linux.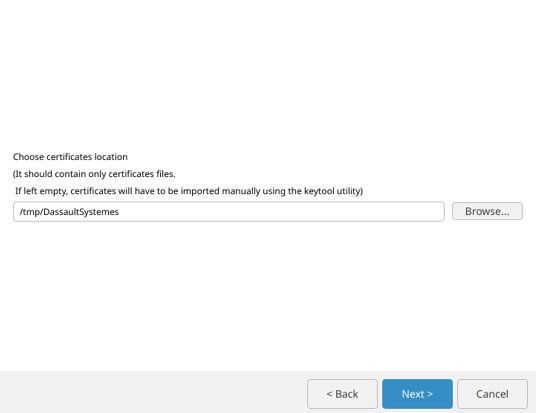
If you leave the path blank, you can import the certificates manually later as a post-installation step. For more information, see Installation and Setup: Install: 3DEXPERIENCE Platform: Reconfiguring the 3DEXPERIENCE Platform Installation.
Click Next.
-
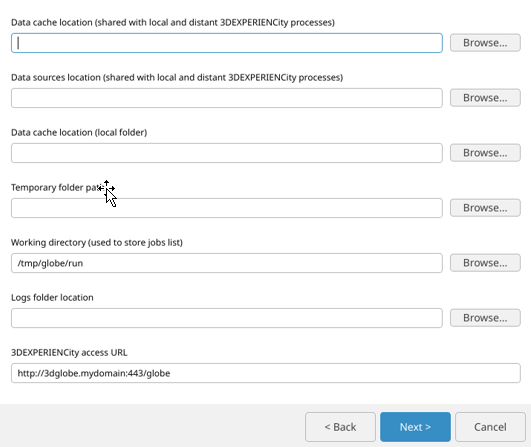
Specify the following cache-related information:
- The shared distant path; that is, the Globe filer cache path. Having a disk with high IOPS is better (such as an SSD).
- The shared distant sources path
- The local cache path (Having a disk with high IOPS is better)
- A temporary folder path
- The 3DGlobe access URL, for example, https://3dglobe.mydomain:443/globe
-
Register the already installed Exalead CloudView information: .
- Base url (for example, http://MyDomain/)
- Base port
- Connector port
- Search API port
- Management API port.
-
From the Database type options, select one of the
following:Oracle or SQL, and
click Next.

-
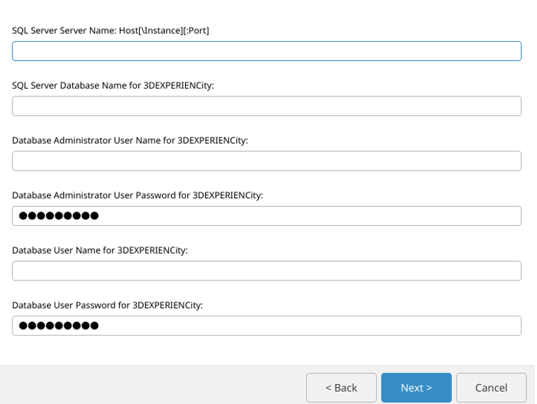
Specify the database parameters, for example with if you selected an SQLServer:
-
Enter the administrator credentials:
- Administrator Name:
- This username must be created in 3DPassport as explained in Installation and Setup: Install:
3DEXPERIENCE Platform: Installing 3DEXPERIENCE Platform Services
for the First Time: Installing Services One-by-One: 3DPassport:
Post-Installation: Creating End User Passport Data Manually in
the Local Database and in 3DSpace, and must have administrator rights in 3DSpace. We recommand that you keep the default
admin_platformuser as it is automatically created with the correct rights.
- Administrator Password:
- User password corresponding to the administrator.
-
Specify the Globe Compute start port, end port, socket port, web socket port,
and hypervisor IP.

Note: The default local is: 127.0.0.1. - Click Next.
-
Specify the Path to the 3DEXPERIENCE platform SSL certificate and the Java Cacert password.

-
Specify the TOMCAT RMI port number.

-
Review your installation choices, then click Install.
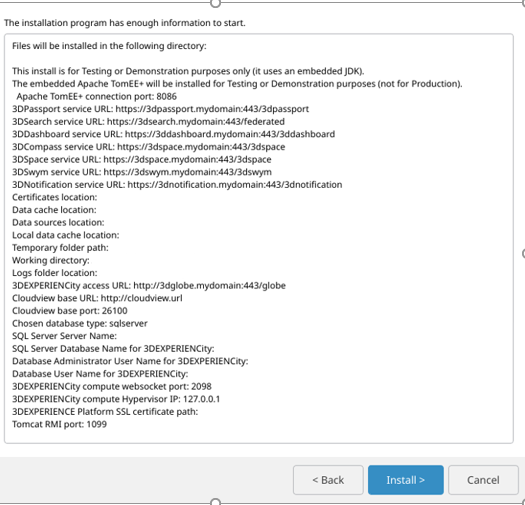
When the installation is complete, you get a message saying Installed Components: GEOVIA Globe Service OnPremise WebApp Technical Product. -
Click Close.
Globe service is now up and running. To get access to Globe widgets, you must register the service URL in other 3DEXPERIENCE Platform services.
- Edit the mxEnvCAS.sh file of 3DSpace deployed in {3DSpaceInstallpath} /server/scripts/.
-
Before the Matrix One Recommended Settings section, add
the following information:
GLOBE_URL= https://<hostname>:<port>/globe
export GLOBE_URL
-
Register the Globe service in the Federated Search service to retrieve Globe
objects in the search. To do so, copy then paste the automatically generated
file:
${INSTALL_PATH}/linux_a64/templates/globe.properties
On the Federated Search service here:
${FEDERATED_SEARCH_INSTALL_PATH}/apache-tomcat/webapps/federated/WEB-INF/classes/federated_config/source/
-
After moving the file, restart the Federated Search service to register the
modification:
${FEDERATED_SEARCH_INSTALL_PATH}/apache-tomcat/bin/shutdown.sh
${FEDERATED_SEARCH_INSTALL_PATH}/apache-tomcat/bin/startup.sh
The Globe service is deployed and well-integrated in the 3DEXPERIENCE Platform. -
Restart the 3DSpace service to take the modification into account.
If you decided to use external TomEE+, you must set up some parameters and libraries as explained below.
-
Assuming ${TOMEE_PATH} contains the path to your local TomEE application
server, add the following property at the end of your
${TOMEE_PATH}/conf/catalina.properties:
org.apache.johnzon.max-string-length=1048576
-
Run the following command to modify ${TOMEE_PATH}/conf/web.xml:
sed -i "s </web-app> <mime-mapping><extension>ctds</extension><mime-type>application/json;charset=UTF-8</mime-type></mime-mapping></web-app> g" ${TOMEE_PATH}/conf/web.xml -
Add support for 3dxc:
sed -i "s </web-app> <mime-mapping><extension>3dxc</extension><mime-type>application/octet-stream</mime-type></mime-mapping></web-app> g" ${TOMEE_PATH}/conf/web.xml -
Run the following command to support cookies for HTTP only in a secure
way:
sed -i "s </session-config> <cookie-config><http-only>true</http-only><secure>true</secure></cookie-config></session-config> g" ${TOMEE_PATH}/conf/web.xml - Restart the tomEE service.