Replacing Elements

You can replace a geometric element by another.

This may be useful when a modification occurs late in the design as the whole geometry based onto the element that is replaced is updated according to the new specifications coming from the replacing elements.


Before you begin: Create a 3D shape containing geometric elements.
  1. Right-click the geometric element and select Replace... .
    The Replace dialog box appears.
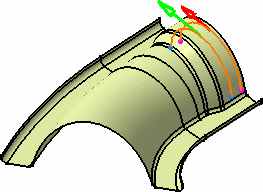
  2. Click in the With box and select the blue curve in the geometry.
    The Replace dialog box is updated accordingly and the geometry displays the curve orientation.
    Important:
    • You can change the orientation by clicking the green arrow. The replaced feature is thus inversed, you can check the inversion when editing the feature on which the replacement has been performed: in the edition dialog box, the feature name is followed by "(inversed)".
    • You can cancel the inversion of the feature by clicking the icon in the edition dialog box.

      In case of multi-selection, right-click the feature and select Uninverse.

    Note that these capabilities are only available when editing Generative Shape Design features.

    A warning message is issued if the element to replace is a published element.
    • Click Yes to replace the published element.
    • Click No to cancel the operation and close the Replace dialog box.
  3. Select the Delete replaced elements and exclusive parents check box if you do not need these elements for later operations.
  4. Click OK to validate the replacement.
    The geometry is updated accordingly.

    Important:
    • You cannot replace elements that are not updated.
    • You cannot replace elements such as pads for instance.
    • You can only replace a body that is pointed by an Add feature (Boolean Operation). For more information, see 3D Modeling: 3D Modeling Core:Part Design User's Guide: Associating Bodies: Adding Bodies.