-
From the Surface section of the action bar, click Revolve
 . .
- In the Profile box, select the profile to be revolved.
- In the Revolution axis box, select the desired axis. It can be a line
or the axis of a sketch.
The revolution surface is limited by the default angle values
defined with the Angle type. 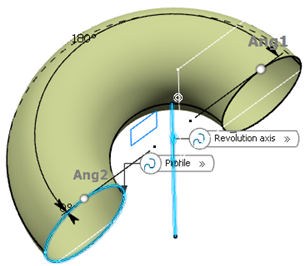 -
For First Limit and Second Limit, specify the limit types of the revolution.
- Angle: Enter angle values or use the graphic handles to
define the start and end limits of the revolution surface.
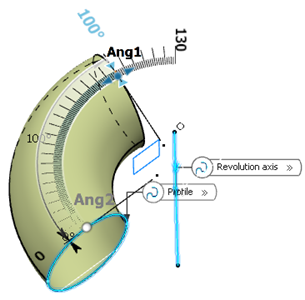
-
Up-to element: Select a geometric element. It can be a point, a
plane, or a surface. If a point is specified, the up-to element is the plane normal to
the revolution direction passing through the given point.
Note:
Wires cannot be selected
as up-to element.

In the example, one side of the revolution
surface is limited by the plane. Enter an angle value to define an offset from
the up-to element.
- Click OK to create the surface.
|