Creating a Thick Surface | |||||
|
| ||||
-
From the Volume section of the action bar, click Thick Surface
 .
.
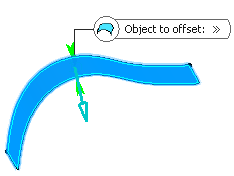
- In the Object to close box, select the surface you want to thicken.
In the work area, the arrow that appears on the extrude element indicates the first offset direction. If you need to reverse the arrow, click it or click Reverse Direction
 .
.
- In the First Offset and Second Offset boxes, enter the offset values and 6mm
as the value.

-
Select a Smoothing mode.
Option Description None No smoothing is applied. This is the default option. The Max deviation box and Constant thickness option are dimmed. Manual Allows you to enter a maximum deviation. The default value is 0.1 mm. The Constant thickness check box is enabled to allow you to apply a constant thickness. Automatic Smoothing is applied automatically. The Max Deviation box is dimmed. However, the Constant thickness check box is enabled to allow you to apply a constant thickness. Note:You can select Disable Tangency Continuity in the Lateral Edges area to avoid tangency continuity on the lateral edges.
- Click OK.The surface is thickened. The operation (identified as ThickSurface.xxx) is added to the tree. The resulting feature does not keep the color of the original surface, but is displayed in the color you selected as default for volumes:
