-
From the Surfacing section of the action bar, click
Compare
 . .
-
Select Display Lists.
You can select any combination of:
- Bodies
- Geometrical Sets
- Basic Features
- Frames
- Display Lists
- Selection Sets
The defined display lists appear on the source side (left).
-
Select four display lists and click
>.
Note:
You can select 2-6 items from the source side.
The selected items are added to the view side (right).
-
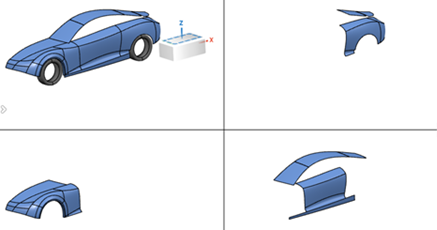
Click Apply Views.
The work area switches to the tiled view.  - Optional:
To reorder the view list, drag-and-drop the items and click Apply
Views.
- Optional:
To swap the contents of two windows, click the boundary between them. This also
changes the order of the view list.
- Optional:
To switch between a horizontal and a vertical layout, use the Tile
Preference option.
- Optional:
To show more views, add another item and click Apply
Views.
-
To switch back to the main view, click Single
View.
-
Click Compare
 to
minimize the Compare panel. to
minimize the Compare panel.
Notes:
The panel state and the selected list content are stored within the
model.
|