About the Slider | ||
| ||
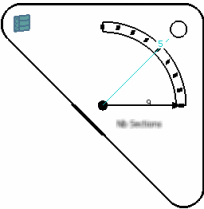
When performing certain operations, a slider is displayed at the right of the screen. An interactive zone is defined around this slider.
Here is an example with the slider displayed in the Face Cutting command.
- When you are within this zone, the pointer position allows to preview the value which is highlighted. Move and click the pointer in the interactive zone, so that the cursor moves to the highlighted value on the slider.
-
The slider can be customized using the anchor point circle at the
lower end of the slider. Drag this point across the screen. The
preview of the location where the slider can be dropped is
displayed. The slider automatically changes its shape according to
its position, either horizontal, vertical or in a corner.


- The slider can be scaled using the resizing handle on top.

- Click
 to open a dialog
box that lets you modify certain parameters.
 When the dialog box is open, the Tools Palette disappears.
Tips: - The box is automatically updated whenever you move the slider and vice-versa.
- You can manually modify the value and define a value smaller or greater than the value displayed in the slider.