Adding Circular Stairs | |||||
|
| ||||
Context: Circular stairs do not have vertical central columns to support the structures. As a result, circular stairs can have good visibility from one story to the next. They often are used as focal points and when the stair space is limited.
-
From the Building section of the action bar, click Circular Stairs
 .
.
- To change the tread width, in the Circular Stair dialog box, from the stair option list.
- Click Stair Width
 .
. - In the 3D area, in the bottom value box, enter the tread width or drag the handle to the desired width.
- Click Stair Width
- To change the unit run, that is, the tread depth, from the step option list:
The unit run is measured along the path a travel. The path of travel is offset a specified distance from the inner radius of the stair. This path of travel offset distance is specified Buildings tab, which you can access from the top bar by selecting Me
 > Preferences.
- Click Unit Run
 .
. - In the 3D area, in the bottom value box, enter the tread depth (tread width without the nosing) or drag the Unit Run handle to the desired tread depth.
- Click Unit Run
- To change the nosing, that is, the overhang on the front part of the tread, from the step option list:
- Click Unit Run .
- In the dialog box, in Nosing, enter the nosing distance.
- Click Unit Run
-
To change the total number of risers, that is, the number of steps, from the stair options list:
- Click Number of Risers
 .
. - In the 3D area bottom value box, enter the number of risers.
- Click Number of Risers
- To change the stair orientation, click either:
- Clockwise
 .
. - Counterclockwise
 .
.
- Clockwise
- Click
 .
.
The building includes the circular stairs. In the tree, the system lists the circular stairs in Shell
and Core. 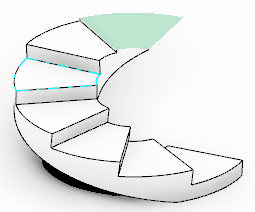
You can now add one or more landings to the circular stairs.