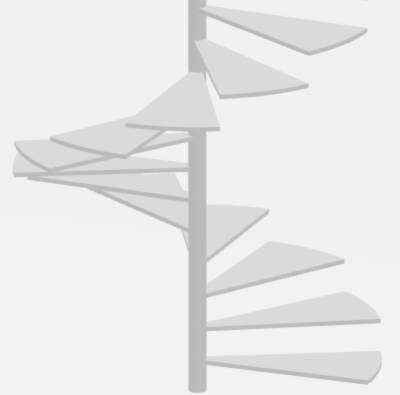
Adding Spiral Stairs | |||||
|
| ||||
Context: Spiral stairs are like circular stairs, except instead of an inner diameter, a spiral staircase has a pole that supports the structure. Spiral staircases have treads, without risers. They are often used as focal points and when stair space is limited.
-
Before you begin:
- Create a mass with two or more stories.
- Activate the story where you want to locate the bottom of the spiral stairs.
-
From the Building section of the action bar, click Spiral Stairs
 .
.
-
In the 3D area:
- Drag the spiral stairs to the desired location.
-
Use the Robot at the bottom of the stairs to position the stairs and to change the orientation of the stairs.Note: To increase the visibility, zoom to the stairs.
- To adjust the spiral stairs height, drag the Height handle.
Alternatively, enter the height in the top value box.
- To change the elevation for the bottom of the spiral stair, in the Spiral Stair dialog box, in Starting Story, select a story.
-
In the Spiral Stair dialog box, from the stair option list, click Stair Diameter
 .
.
- In the 3D area, in the bottom value box, enter the stair diameter or drag the Stair Diameter handle.
- In the dialog box, in Pole Diameter, enter the diameter of the pole.
- In Pole Above Height, enter the distance that the pole extends beyond the spiral stairs height.
-
In the Spiral Stair dialog box, from the stair option list, click Tread
 .
.
- In the dialog box, in Tread Angle, select the tread angle from the list.
A larger tread angle results in larger treads and fewer steps per revolution. Larger tread angles also increases the headroom of the spiral stairs.
- In Overlap Distance, enter the distance by which consecutive treads overlap each other.
A lower overlap distance results in fewer steps per revolution, and more usable area per tread. Lower overlap distances also reduce the headroom of the spiral stairs.
- In Tread Thickness, enter the tread thickness.
- Select the Circular Tread check box to create circular tread edges.
- In Top Tread Type, select the shape.
Option Description Same Sets the shape and size of the topmost tread the same as the rest of the staircase. Circular Creates a circular top tread. In Top Tread Angle, select the size of the tread from the list. Triangle Creates a triangular top tread. In Top Tread Angle, select the size of the tread from the list. Rectangle Creates a rectangular top tread. In Top Tread Depth, enter the depth of the top tread. Square Creates a square top tread. In Top Tread Angle, select the size of the tread from the list. - In the dialog box, in Tread Angle, select the tread angle from the list.
-
To change the total number of risers, that is, the number of steps, in the
Spiral Stair dialog box, from the stair option list:
- Click Number of Risers
 .
. -
In the 3D area, in the bottom value box, enter the number of stairs.Note: A larger number of stairs reduces the headroom and distance between consecutive treads.
- Click Number of Risers
- To change the stair orientation, in the Spiral Stair dialog box, click either:
- Clockwise
 .
. - Counterclockwise
 .
.
- Clockwise
- Click
 .
.
The system adds the spiral staircase to the building. In the tree, the system lists the spiral stairs in Shell and
Core.