Adding a Stairwell | |||||
|
| ||||
-
From the Building section of the action bar, click Stairwell
 .
.
- From the Stairwell dialog box, click Steps Width
 and in the 3D area, optionally, enter a new tread width in the bottom value box.
 Alternatively, drag the Step Width handle to the desired width.
Tip: To see the stairwell details, zoom to the stairwell. - From the Stairwell dialog box, click Unit Run
 and in the 3D area, optionally, enter a new tread depth in the bottom value box.
Alternatively, drag the Unit Run handle to the desired tread depth.
- From the Stairwell dialog box, click Total Number of risers
 and in the 3D area, optionally, enter a new number of risers in the bottom value box.
The value of the total number of risers is the number of steps per story.
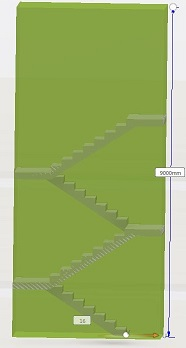
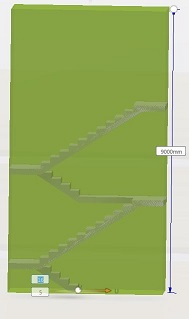
The stairwell has a landing at a story level (for example Story 1) and intermediate landing between stories, and at the next story (Story 2).
The Equal Flights check box appears and is selected by default. When the Equal Flights check box is selected, the number of risers between Story 1 and the intermediate landing is equal to the number of risers between the intermediate landing and Story 2. For example, if the value entered is 16, each story will have 8 risers.
To make the number of risers between the intermediate landing unequal (for example, to make the landing high enough off the floor to give the required headroom below the landing and still provide the space economies that come with a u-shaped stairs), you must:
- Clear the Equal Flights check box.
-
In the bottom value box, enter the number of risers from the landing at Story 1 to
the intermediate landing. The system then makes the remaining risers, the number of
risers from the intermediate landing to the next story (Story 2). For example, if the
total number of risers is 16 and the value of the risers in the first flight is 5, the
value of the remaining risers is 11.
- From the Stairwell dialog box, click Gap distance
 and in the 3D area, optionally, enter a new horizontal distance between flights in the bottom value box.
Alternatively, drag the Gap Distance handle to the desired depth.
- From the Stairwell dialog box, click Landing Depth
 and select:
- Landing Depth to display the landing depth value. By default, the landing depth takes the value of steps width. To modify the value, select the Landing Depth check box and enter the landing depth value in the top value box or drag the Landing Depth handle to the desired tread depth.
- Intermediate Landing Depth to display the intermediate landing depth. By default, the intermediate landing depth takes the value of steps width. To modify the value, select the Intermediate Landing Depth check box and enter the intermediate landing depth value in the bottom value box or drag the Intermediate Landing Depth handle to the desired tread depth.
- To change the stairwell direction, in the Stairwell dialog box, click either:
- Clockwise
 .
. - Counterclockwise
 .
.
- Clockwise
- To remove walls around the stairwell, click Remove Walls
 .
. - Click
 .
.
The building includes the stairwell.
| Tip: If you later add or delete stories, adjust the stairwell height to accommodate your changes. |