Captures Panel
The Captures panel is displayed by default when you enter the 3D Geometry Insight app.
However, if you have closed the Captures panel the last time when you left the 3D Geometry Insight app, the panel is not displayed by default. In this case, you need to activate it using the 3D Annotation Browser command from the View section of the action bar. The Captures panel displays the thumbnails of the captures of annotation sets which are directly under the active product. - The views of the annotation set are browsed:
- If the view is not a multiple plane section view, captures pointing it are added in the panel.
- If the view is a multiple plane section view, then, for all its sub views, captures pointing those sub views are added.
- All captures not pointing to any view are added respecting their order in the tree.
Notes:
- If there is no annotation set related to the active product, the Captures panel is not displayed.
- If there are several annotation sets related to the active product, all the annotation sets having captures are listed in the Captures panel and entitled with the name of the product element containing the 3D shape, the name of the 3D shape itself, and the name of the annotation set. Thumbnails are created for all those captures of annotation sets.
Visualization ModesYou can view the capture thumbnails in the thumbnail or detail mode.
3D Annotation Filter Dialog Box
The 3D Annotation Filter dialog box provides capabilities to filter a product, by defining the filtering criteria. It appears when you use the 3D Annotation Filter command.
The 3D Annotation Filter dialog box contains the following main areas:
- Annotation Sets
- Annotation Views
- Annotations
Note:
The dialog box is not updated synchronously when the visibility of the elements is modified directly in the 3D area. In this case, you can click Refresh Panel in the 3D Annotation Filter dialog box.
Annotation SetsYou can show or hide the 3D area annotation sets available under any 3D area shape of the filtered product in the Annotation Sets area. It consists of the following exclusive options: - All: Shows all annotation sets in 3D area.
Note:
If the product contains large data, when you select All, a message appears informing you that this option can impact the performance.
- Custom: Lets you select the required annotation sets of the filtered product to be shown in 3D area. When you select Custom, it displays the list of all annotation sets directly located under the root product and annotation sets which have already been loaded. You can also show all the annotation sets by choosing Select All option available under the Custom list.
Each annotation set, listed below the Select All option, is represented by: - An icon showing whether this set is contained in a product or in a 3D area part.
- The alias of the product element contains the 3D area shape, the alias of the 3D area shape itself, and the alias of the annotation set. The aliases correspond to the identifier of corresponding elements as displayed in the tree.
- None: Hides all annotation sets of the filtered product.
Note:
You can select only one option at a time based on which visualization of the product is modified immediately. You can select or clear these options to show or hide the annotation sets in 3D area.
Annotation ViewsYou can select which views and captures of visible annotation sets are to be visualized in the Annotation Views area. It consists of the following options: - All: Shows all the annotation views contained in the current annotation set.
- Custom: Lets you select required annotation views or captures of visible annotation sets. When you select Custom, it displays the list of all annotation views available in the current 3D area shape which is being edited. You can also show all the annotation views or captures by choosing Select All option available under the Custom list.
Each annotation view or capture, listed below the Select All option, is represented by: - An icon showing whether it is a view or a capture contained in a product or in a 3D area part.
- The alias is composed of the alias of the capture, the alias of the 3D area shape, or the alias of the annotation set. The aliases correspond to the identifier of corresponding elements as displayed in the tree.
If a view is selected, all the annotations contained inside that view are selected in the Annotations area and are displayed in the 3D area. If a capture is selected, all annotations defined as visible by that capture are selected in the Annotations area and are displayed in the 3D area along with this capture 3D area representation (if any). If a view or a capture are cleared, all its annotations are masked in the 3D area. They are also cleared in the Annotations area. AnnotationsYou can select which annotations of visible annotation sets are to be visualized in the Annotations area. The annotations are classified according to their type, individual annotations, default annotations, or tolerance value. - All: Shows all annotations contained in the visible annotation sets.
- Of Type: Lets you define the type and subtype of the annotations to be displayed. When a type is selected, all its subtypes are automatically selected, and when a type is cleared, all its subtypes are automatically cleared. For example, if the Non Semantic type is selected, then all the annotations falling under non semantic annotations are automatically selected.
- Custom: Lets you select required annotations of the visible annotation sets. When you select Custom, it displays the list of all annotations available in the current annotation set which is being edited.
Each annotation type is represented as a section header, and in each section header, an annotation is represented by its icon, and its alias as displayed in the tree. - Only Default Annotations: Shows only default filtered annotations. When this option is selected, all types of annotations remain enabled in the list. They can be filtered if required. This is an optional filtering criteria.
- Tolerance: Shows only those annotations which are within the specified tolerance limit.
You can choose between <=, <, and = in the first sign list box. In the second list box, you can choose between <= and <. You can specify the numeric value in the first and the last boxes. When the appropriate criterion is entered, the annotations already displayed by other filters and with a tolerance within the defined limits are displayed in the 3D area. If a numerical box is empty, the corresponding tolerance limit is ignored. This is an optional filtering criteria.
Note:
You can only select one option between All, Of Type, and Custom at a time. The two other options allow you to filter default annotations or tolerance between the annotations already displayed.
- Update of Annotation Views Area
Each time a modification is performed in the Annotations area, the content of the Annotation Views area is updated. Each view and capture status may be changed between selected, undefined and cleared in the Custom mode list. - If all annotations of a view or a capture are displayed according to Annotations area, the respective view or capture is checked in the Annotation Views area.
- If at least one annotation of a view or a capture is masked according to Annotations area, the respective view or capture is undefined in the Annotation Views area.
- If all annotations of a view or a capture are masked according to Annotations area, the respective view or capture is cleared in the Annotation Views area.
Clipping Display
When you display a capture or a view in the 3D Annotation Insight app, a clipping corresponding to this view or to the view referenced by the capture is displayed.
In this case, a clipping label is displayed at the upper right of the screen. It indicates that a clipping is still active. The name of the referenced view is displayed in this label. You can remove the clipping by clicking the clipping label.

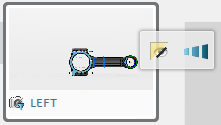
The Context ToolbarThe context toolbar appears when you select any geometry or 3D Tolerancing & Annotation element such as an annotation, a view or a capture.

 : Disable display: Hides the selected elements if they are visible. : Disable display: Hides the selected elements if they are visible.  : Enable display: Displays the selected elements if they are hidden. : Enable display: Displays the selected elements if they are hidden.
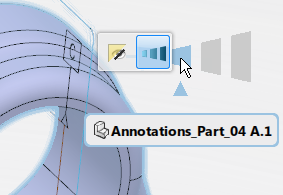
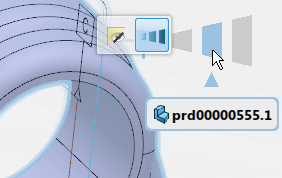
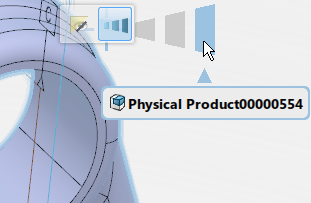
 : Display Level Selector: Enables displaying a parent of the currently selected element. The level selector is displayed when you select geometries or a 3D Tolerancing & Annotation element in the work area. It is placed where you have clicked. : Display Level Selector: Enables displaying a parent of the currently selected element. The level selector is displayed when you select geometries or a 3D Tolerancing & Annotation element in the work area. It is placed where you have clicked.
- If you select a geometry, it enables you to select all the annotation sets contained either in one of the following scenarios:
- In its 3D area shape (when a 3D area part or when a single 3D area shape is instantiated in a product)
- In all the 3D area shapes instantiated directly under the product or 3D area part containing it
- In all the 3D area shapes instantiated directly under any specific upper product, up to the assembly root
- If you select a view or a capture, it enables you to select either the view/capture itself or its annotation set.
- If you select an annotation, it enables you to select either the annotation itself or its view or its annotation set.
If several annotation sets are related to the current selected level and their visibility states are heterogeneous, the icons  and and  are available in the context toolbar. are available in the context toolbar. - Displays all linked annotations pointing the same geometry
 : Displays all the annotations linked to the selected geometries and hides all other annotations. This command is available when you select only geometries and of some annotations are linked to the selected geometries. : Displays all the annotations linked to the selected geometries and hides all other annotations. This command is available when you select only geometries and of some annotations are linked to the selected geometries. - Shows linked annotations pointing geometry
 : Displays all the annotations visually showing to which geometries selected annotations are linked to. But it does not change the display of any other annotations. This command is available when some of the annotations are hidden. : Displays all the annotations visually showing to which geometries selected annotations are linked to. But it does not change the display of any other annotations. This command is available when some of the annotations are hidden.
|
