Creating a Blend Between Curves

You can create a blended surface between curves.


Before you begin: Open a 3D Shape containing curves with supports.
  1. Select two curves using Ctrl.
  2. Click Blend in the context toolbar.
    A blended surface is created between the curves.

  3. Click at the first curve and select its support.
    The blended surface is created with a tangent continuous transition between the first curve and support surface.

    The icon changes to . Clicking it removes the support.

  4. Click Impose Curvature Continuity .
    The transition quality changes to curvature continuity and the icon to . Clicking it will change again the transition quality to point continuity and the Impose Point Continuity icon appears.
  5. Click at the second curve and select its support.


  6. Optional: If the blended surface is not created in the desired direction as in the example shown, click the arrow handle normal to the support surface edge.
    The direction of the blended surface is reversed and provides a result with a smooth transition.
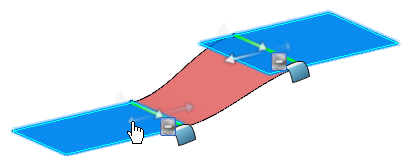
    Note: You can use the arrow handle tangent to the support surface's edge to invert the profile direction, for example, in case of geometry with twisted zones.