Measuring an Arc Using Three Points | ||
| ||
-
From the secondary area of the Review section of the action bar,
click Measure Arc Through 3 Points
 .
.
- The pointer changes to the measure pointer
 . Depending on the position of the measure pointer, it may also
show a symbol indicating the object you can select with it. For a list of all the
measure pointers, see Pointer Transformation.
. Depending on the position of the measure pointer, it may also
show a symbol indicating the object you can select with it. For a list of all the
measure pointers, see Pointer Transformation. - The Measure Arc Through 3 Points dialog box appears with the Specifications tab activated.
- The pointer changes to the measure pointer
-
Select the first point to be used to measure the arc.
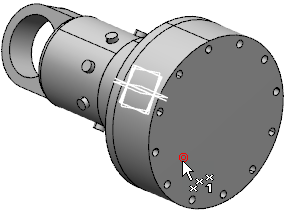
- In the Measure Arc Through 3 Points dialog box, the Point 1 box is completed with the coordinates of the selected point.
- The pointer changes to
 .
.
-
Select the second point.
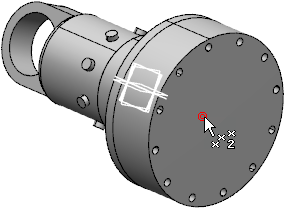
- In the Measure Arc Through 3 Points dialog box, the Point 2 box is completed with the coordinates of the selected point.
- The pointer changes to
 .
.
-
Select the third point.
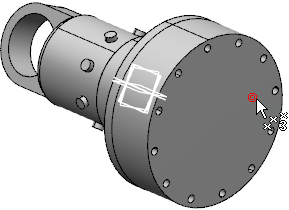
- In the Measure Arc Through 3 Points dialog box, the Point 3 box is completed with the coordinates of the selected point.
- The arc with angle is displayed in the 3D area.

The Customize and Results tabs in the Measure Arc Through 3 Points dialog box now become available.
In the Customize tab, you can show or hide different parameters in the 3D area and the Results tab. .
Important:
|