Drafting Shapes | |
| |
-
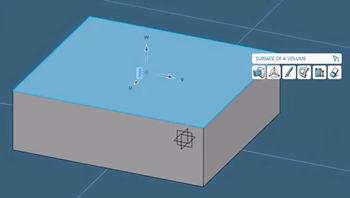
Select a neutral face to draft, which serves as the reference point of the
resulting draft.
 Note: You can change the neutral face by clicking Change neutral element
 in the selection bar and using the picker to select a new neutral face.
The picker color changes from red to blue once the operation becomes
possible.
 - Click Draft
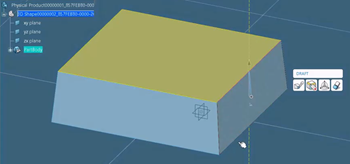
 .The neutral surface is highlighted in yellow and all of the surrounding surfaces are drafted at a 5-degree angle by default.
 Notes:
- An arrow highlighted by a yellow dotted line displays the pulling direction. This is particularly useful for maintaining an orientation sense.
- You can reverse the angle direction by clicking Reverse
Direction
 in the Options section of the
Direction panel. The default angle value is
5 degrees.
-
Drag the handle to edit the draft angle.

Notes:- To specify a precise angle value, you can also edit the value directly in the Angle section of the Draft selection panel.
- Select a single surface to edit the Draft angle of only one of the surfaces. The draft angle of the remaining surfaces remains the same.
-
To edit the direction of the draft angle, use the
Draw
 command to draw a line in 3D.
This line's direction serves as the reference point for the draft
direction.
- Select the surface of the draft direction you want to edit.
-
Click Pick the pulling direction
 in the
Draft selection panel, then click the line.
The draft direction of the selected surface is modified and indicated by an arrow that shifts directions near the draft.
 -
To remove a draft from a selected surface, click the Break draft
properly
 command in the selection bar.
| See Also |
| Drafting While Extruding |