Analyzing and Verifying Interference Simulation Results | |||||
|
| ||||
-
From the Review section of the action bar, click Analyze
Interferences
 .
The interference simulation list appears:
.
The interference simulation list appears:- The list contains interference results from all the interference probes
available under the current markup.
Tip: You can also double-click the Interference results node in the tree, to analyze the results of a particular probe. - If the context of the review is an interference simulation, the list contains the results of that interference simulation.
When you hover over a result, the details of the interference appears in a tooltip.
In case of a PPR context, you can display only one result line for interferences between two provide nodes. To do so, specify the following prerequisites before clicking Analyze Interferences
 :
: - Select the Highlight associated products and
Select associated manufactured items
check boxes available at Me
 > Preferences
> Infrastructure > DELMIA Infrastructure >
PPR.
 - From a customized section of the action bar, click PPR Object
Selection
 to turn it on.
 - To display only the worst case, clash for example, among the calculated interferences, set the following environment variable: DELMIA_REVIEW_INTERFERENCE_WITH_MFGITEM=1.
- The list contains interference results from all the interference probes
available under the current markup.
-
Select the required interference from the interference simulation list.
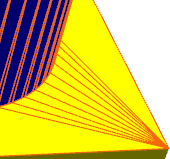
- The 3D geometry is reframed with interference curves appearing based on the selected interference.
- If the selected interference has a slide created for it, the slide is applied automatically provided that the corresponding markup is active. If there are several slides created for the selected interference, the first related slide in the active markup is applied. This behavior is applicable only when the review is created with an interference simulation as a context.
Clearance Clash Contact 

 Notes:
- If you select Color according to interference
under Color Overload, available in Me
 > Preferences
> Digital Mock-up > Interference Check > Interference Display tab, colors are applied to the interfering parts
according to their interference type.
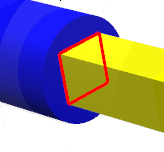
 By default, colors applied to the interfering parts are as below:
- Clash:

- Contact:

- Clearance:

- Clash:
- These colors are applied based on the system status. You can change these colors as required.
- For a feature with multiple interferences, the color applied is based on the worst case. For example, if a feature clashes and is in contact with another feature, it appears in the color applied to indicate the clash (by default, red), which is the worst case.
- If you select the check boxes under Interference numerical result display, movable annotations appear for clash or clearance in the selected interference simulation.
- Optional:
Move the Context transparency slider to adjust the
transparency of the objects that are not a part of the selected interference.
- When you select the Context transparency check box, default transparency is applied.
- When you clear the Context transparency check box, the assembly is displayed with the original colors applied to it.
- When you reopen the interference using Analyze
Interferences
 , previously selected interferences are selected and previously
applied transparency is applied.
- Use the commands on the context toolbar to modify the appearance and to measure the parts in 3D area.
- Optional:
In the interference list, use the following options to manage the list
content:
- The sort button available on the column header to sort the interferences in alphabetical order.
- Contextual commands:
Context Menu Available On Command Description Column header Pin Column Lets you pin a column to the left or right. Size Column to Fit Resizes a column to fit its content. Size All Columns to Fit Resizes all columns to fit their content. Hide Column Hides a column. Add Filter Lets you filter the content of a column. After the filter is applied, you can click
 on the column header to modify the filter or
select Remove Filter from the
context menu to remove the filter.
on the column header to modify the filter or
select Remove Filter from the
context menu to remove the filter.Custom Views Lets you customize the list. You can hide or show columns, change their width and position, pin them, sort their content in alphabetical order. Row header or cell Export Filtered Exports the filtered interferences to an HTML or .csv report. Export Selected Exports the selected interferences to an HTML or .csv report. Center Graph Centers the tree to the interfering parts.
-
Select an interference in the interference list, and click
Slide
 on the action bar.
The current interference results are captured in the slide. The slide is created with the same name as that of the selected interference.
If you have selected several interferences in the interference list, the slide is created with the name of one of the interferences.