Creating a Line Normal to a Curve | |||
| |||
-
From the Create
section of the action bar, click Line
 .
.
-
Select
 Angle/Normal to curve.
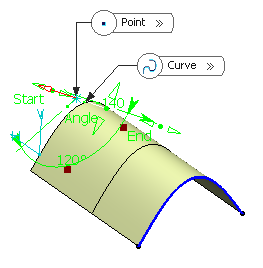
- In the Curve box, select a reference curve.
- In the Support box, select a surface containing that curve.
Important: - If the selected curve is planar, then the Support is set to Default (Plane).
- If an explicit Support has been defined, a context menu is available to clear the selection.
Tip: We advise you to avoid the creation of lines when the direction does not lie on the support, as well as the editing of the angle between the direction and the support in such cases. - In the Point box, select a point on the curve.
- In the Angle box, type the value or use the arrows to change the angle value.

A line is displayed at the given angle with respect to the tangent to the reference curve at the selected point. These elements are displayed in the plane tangent to the surface at the selected point.
You can click on the Normal to Curve button to specify an angle of 90 degrees.
Proposed Line End and Point Offset points of the line are shown.
-
In the Line End and Point Offset
boxes, select the start and end points of the new line.
The corresponding line is displayed.
- Click OK to create
the line.
The line (identified as Line.xxx) is added to the specification tree.