Creating a Branch on a Bend | |
| |
-
On the context toolbar, click Create Branch on Bend
 .
.
-
In the Branch on Bend panel, select one of the Branch
Mode.
- Radial
 : creates a
radial branch that is normal to the centerline of the bend.
: creates a
radial branch that is normal to the centerline of the bend. - Axial: creates a
branch following the direction of the segment.
- Radial
-
If you have selected Radial as
Branch Mode, perform the following actions:
- Click the green point to toggle between the bend ends.
-
Drag the linear manipulator to define the branch point position.
You can also enter a value in the Angle or in the Snap Step boxes from the Branch on Bend panel.
- Drag the branch preview to modify its orientation.
The following picture illustrates the different graphic elements in Radial Branch Mode :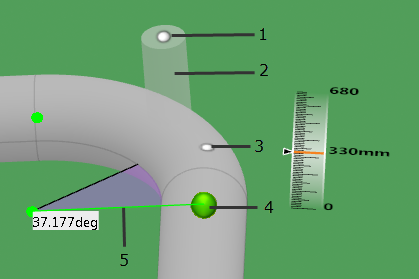
- 1: branch length manipulator
- 2: branch preview
- 3: linear manipulator
- 4: active bend end
- 5: reference line created between the center point and the active bend end. The rotation angle displayed in purple is measured in reference to this line.
-
If you have selected Axial as
Brancn Mode, perform the following actions:
- Click the green point to toggle between the bend ends.
- Drag the linear manipulator to specify the axial offset distance.
- In the Branch on Bend panel, specify the radial offset distance. The radial offset is the distance between the branch and the center line of the main route.
- Drag the branch preview to modify its position.
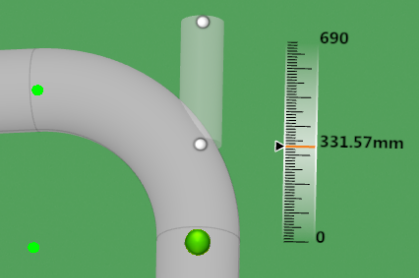
The following picture illustrates the different graphic elements in Axial Branch Mode
.
-
Drag the branch length manipulator or click
 to validate the branch creation.