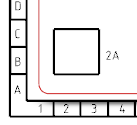
-
Create a logical reference and insert a symbol representation
under the reference.
For more information, see
Creating a Symbol Representation.
-
To edit the symbol representation in
Symbol Design,
double-click the symbol object.
-
From the Symbol Edition section of the action bar, click Text Template
 . .
-
In the
Link Template dialog box, define a link
template:
-
In the Package box, select Schematic
Design.
-
In the Name box, select Schematic
Symbol Instance.
-
In the Attributes area, select Symbol
Frame Position X.
-
Click Insert.
-
Select Symbol Frame Position Y and click insert.
-
Open a diagram view.
-
Right-click the reference for which you have defined the text
template and select
Place in View.
-
Click the diagram view to place the symbol.
Note:
If no text template is defined, you can display the
frame coordinates by clicking
Display Frame Coordinates
 in the
View section. in the
View section.
The text templates are replaced by the name of the frame
coordinates.

|