-
In the
Variant panel, click the plus sign
 at the bottom of the panel to add more variant lines.
Icons appear for creating product, position, material,
viewpoint and stage variant lines.

-
Click the icon corresponding to the stage variant line
 .
.
-
Select the product, viewpoint, material, and position variants you
want to include in the stage.
For example, select a product variant and a viewpoint variant.
-
In the
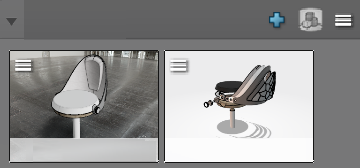
Stage line area, click the plus button
 to create the first variant thumbnail.

- Optional:
Rename the variant thumbnail if
needed.
Your first stage variant is created.

-
Select the product, viewpoint, material, and/or position variants
you want to include in the other stage.
For example, select another product variant and another viewpoint
variant.
-
In the Variant panel, at the upper right of the
Stage line area, click the plus sign
 .
.
- Optional:
Rename the variant thumbnail if
needed.
-
Repeat steps 6 to 8 as many times as necessary.
Your other stage variant is added to the stage line.


