Moving a Node | |||
| |||
-
Double-click a route.
You switch to the Electrical Raceway 3D Part Design app and a yellow symbol appears on each node of the route.
-
Click next to the node you want to move.
The 3D Manipulator appears and the Bend Manipulator is activated.Note: If the node is the last node of the route, the Length Manipulator is directly activated. You need to press the A key to switch to the Bend Manipulator.
-
On the context toolbar, click Move Route Node
 .
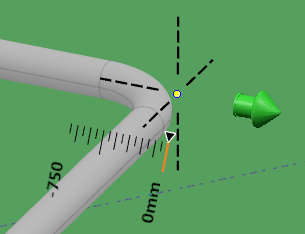
A green manipulator and six dashed lines appear.
-
In the Move Route Node panel, select the options, and
enter the values of your choice.
Option Description Snap Step Specifies the graduation value displayed on the ruler Orient Mode  Local: orients the white dashed lines
according to the local axis.
 Global: orients the white dashed lines
according to the global axis.
 Robot: orients the white dashed lines
according to the orientation of the Robot.
 Context Mode  Geometry: orients the branch in the direction
of the nearest port of the selected part, line, or plane.
 Port: orients the branch according to the
direction of the selected object.
 Context Selection Mode  Move Node: updates the position of the node
based on the offset mode and the offset distance.
  Modify the Origin of the Rule: displays the
distance between the context selection and the selected node.
 Automatic : chooses between the
Move Node and Modify the Origin of the
Rule options automatically.
 If the new node position generates update errors while using the Automatic option, the Modify the Origin of the Ruler option is applied.
If there are no update errors, the Move Node option is applied.
-
Hover over one dashed line to select the direction of the
modification.
The position of the green manipulator is updated according to the selected direction.
-
To move the node, do one of the following:
- Drag the green manipulator to move the node along the selected direction or select a point, a line, or a plane.
- Select another route and then select one of
the yellow nodes to move the current node until the selected node. Note: If you select a route with an elbow, the displayed nodes are the ports, the ports intersections, and the ports directions.
Tips: - You can also press the Space bar to enter a value.
- You can press the W key to select a node on the same route.
- Optional: Hover over another white dashed line to change the direction and drag the green manipulator to move the node along the new direction.