Create a Light Source
You can create a light source from the action bar.
-
From the Rendering Scene Design section of the action bar, click the appropriate light type in the flyouts to create physical (such as
 ) and
nonphysical (such as
  ) light sources.
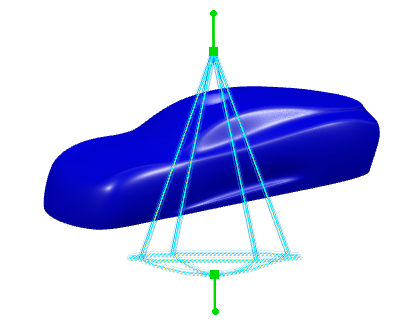
The created light illuminates the object in the work area. Below is an example with a spot light.
Wireframe is the default representation mode. To display the light in shading mode, select Shaded in the Light Representation preferences.
Important: If an ambience is inserted in your scene, editing the ambience reference opens Ambience Studio that lets you use the Light Sources panel to create and manage light sources. For more information, see Edit a Light Source from the Light Sources Panel. - Use the handles to manipulate the light, or to modify the angle or the attenuation for example.
-
To activate or deactivate a light created in Rendering Scene Design, right-click it in the 3D area, and
then select Hide/Show.
You can also right-click the light in the 3D and then select Hide/Show.
Important: Some active lights may not be seen in the work area even if they are defined as active. In that case, a warning sign identifies the light in the tree. On most platforms, you can see up to eight lights at the same time, however you can see more lights according to your graphics card.
-
To deactivate a light created in Ambience Studio (displayed under the ambience node
 in the tree), right-click the light in the tree or in the 3D area, and
then select Activate/Deactivate Light.
The light symbol is displayed in black instead of yellow.