Setting up OnePart Reduce

Details how to set up NETVIBES OnePart Reduce and importing your own content.

This task shows you how to:


Before you begin:

As of version 2016x R1, setup is no longer required for OnePart Reduce. It is ready to use out-of-the-box with the following requirements:

  • A valid license for OnePart Reduce
  • A running instance of OnePart standard
  • The OnePart Reduce user also must have access to all the files

Migrate OnePart Reduce

This section decribes how to migrate from OnePart Reduce v1 to v2. For example, from R2019x FD03 to R2019x FD06. This migration tool is official supported starting at R2019x FD06 (which means you can migrate from R2019x FD03 to R2019x FD06).

Before you begin:
  • It works only if you index the same data using the same connector configuration (including connector's name)
  1. Go to your v1 datadir/studio/universes and copy the folders of the universes you want to migrate into your v2 datadir/studio/universes
  2. Open a cmd window and execute your v2 datadir/bin/cvconsole.exe
  3. Run the following command: cvapps reduce change-searchserver-ur with 3 parameters: universeDir= your v2 datadir/bin/universes universesDir, host= host name, baseport= installation base port

    For example, cvapps reduce change-searchserver-url universeDir=D:\ \jsmith\ \Installs\ \12_09_2019\ \data_13000\ \studio\ \universes host=server001.office.exalead.com baseport=10000

    Note: In Windows, you need to escape your backslashes in the path (e.g. '\' => '\ \')
  4. Restart the search server.

Import the cost analysis data

To import the Reduce demo data (including the buggy assembly) for Cost analysis assemblies you must perform additional steps:

  1. After you have installed OnePart Reduce, open a cmd.exe as the Administrator.
  2. Go to your ONEPART_INSTALLDIR, which contains install.bat.
  3. Run install.bat –data C:\path\to\your\datadir –demoonly demobuggy

Requirements for using Cost analysis

To perform cost analysis on your own data you must push the following required metas to OnePart:

Context:

Mandatory:

  • erp_price
  • erp_price_currency (USD, EUR …)

Optional:

  • erp_vendor_name

Set up Subclustering by attributes

In OnePart Reduce, the user can group parts related to their shape (clustering). Inside these clusters made based only on their 3D Shape, it is now possible to "subclusterize" by any attribute used in OnePart.

These attributes can be alphanumeric (such as color, material, surface treatment, vendor ...) or can be numeric (such as size, number of holes, thickness ...). It can also be used in some cases without any shape clustering and in theses cases it can be considered as a group by multiple attributes.

Context:

Once the subclustering has been done, it is possible to filter the clusters with specific attributes.

To setup clustering by attribute, you must select which attributes you want to use for the subcluster. By default, only the size and the material are available. Then the users will be able to select on which attributes to use and how to use it in the universe.

  1. In Mashup Builder, open the reduce page.
  2. Edit the properties of the widget OnePartReduce Create Universe Hit.
  3. Click the Attributes tab to add attributes with the options:
    1. Value: Provide the meta from the data model with the prefix
    2. Label: Provide the same meta without the prefix.

      This will be the displayed name in the user interface. You can configure i18n on this field using the reference “meta_LABEL” (for example, “meta_main_color”).

    3. Default Value: Set value by default
    4. Split mode: Choose if numerical or alpha
    5. Split by default: Select if the split option is enabled by default or not.
      For example, to add the color attribute:

  4. For attributes from the EDM (Elastic Data Model), configure the Mashup Builder as in the following example:
    1. Value: dynamic_field:document_edm_alph_s##context_name:edm_alph_s_category_ics##name:category_ics
    2. Label: category_ics

      NOTE: the meta in the EDM must be in "Display type": Display or Search for Alphanum "Data Type". It can be in Facet for Decimal values

Set up Cluster warnings

In OnePart Reduce, the user can group parts related to their shape (clustering). Inside these clusters made based only on their 3D Shape, users may want to check the coherence of an attribute: Are all the parts of the clusters came from the same provider? Do they have the same thickness, the same material? It is now possible to add warnings on clusters when they do not respect the expected coherence on any attributes used in OnePart. These attributes can be alphanumeric (such as material, surface treatment, vendor ...) or can be numeric (such as size, number of holes, thickness ...). To setup warnings on clusters, you must select which attributes you want to use for the warning. The users will then be able to select on which attributes to use and how to use it in the universe.

  1. In Mashup Builder, open the reduce page.
  2. Edit the properties of the widget OnePartReduce Create Universe Hit.
  3. Click the Warning tab to add attributes with the options:
    1. Value: Provide the meta from the data model with the prefix
    2. Label: Provide the same meta without the prefix
    3. Display: Provide the name that will be in the interface (no numbers allowed). You can use i18n.
    4. Default Value: Set value by default
    5. Split mode: Choose if numerical or alpha
    6. Warning by default: Select if the warning is enabled by default or not
    • For example, to add the color attribute:

  4. For attributes from the EDM (Elastic Data Model), configure the Mashup Builder as in the following example:
    1. Value: dynamic_field:document_edm_alph_s##context_name:edm_alph_s_category_ics##name:category_ics
    2. Label: category_ics

      NOTE: the meta in the EDM must be in "Display type": Display or Search for Alphanum "Data Type". It can be in Facet for Decimal values

Set up Taxonomy

In OnePart you can upload your taxonomy file for a standardization universe.

When a user creates a standardization universe, he wants to group parts by shape and give them a common Classification name. Users can help the system by providing a csv file that already gives Classification name to several parts.

Using this file, Reduce will propose to propagate these existing Classification names to all the clusters. You must create a csv in the format below. It's must be encoded in UTF8. The part number value can be found in OnePart Reuse.

Classification part_number
Classification name 1 XXXXX
Classification name 1 YYYYY
Classification name 1 ZZZZZ
Classification name 2 AAAAA

  1. Create taxonomy csv file with the format above.
    Enter Classification/SubClassification to add a Classification and sub-Classification’s names. For example:
    classification,part_number
    Clip,prd-56690527-00000118
    Tube,prd-56690527-00000203
    Nut,prd-56690527-00000054
    carriage/rear undercarriage,prd-56690527-00000213
    servomotor crossed horn,prd-56690527-00000153
  2. Upload your csv file just before building your universe.
    1. Click Choose File under Taxonomy used for categorization.
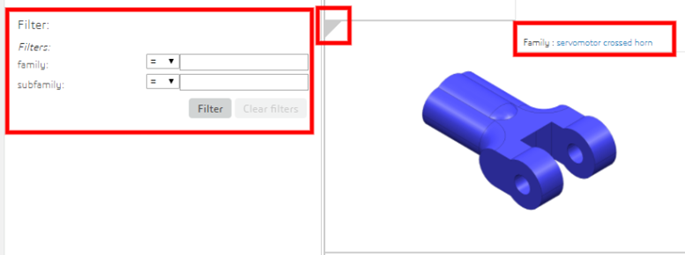
  3. Once the universe has been built, you can see on the treemap that some clusters have a mark to highlight the fact that a Classification name is set. You can filter on a Classification by using the filters on the left or by clicking the tooltip link.

Import your own content

If you are already familiar with OnePart and the demo data, then you are ready to import your own files. For details on importing your File system data in OnePart:

Context:

Access OnePart Reduce

You can access OnePart Reduce either with a valid license or using the evaluation mode.

Reduce evaluation mode

If you do not have the specific Reduce feature in your license (search.users.reduce and/or onepart.reduce.tokens) you will be in Reduce evaluation mode. Note that this evaluation mode is not available in the 3DDashboard.

In evaluation mode, you are allowed to have 2 users accessing Reduce pages (others limits associated to reduce-eval mode are 15000 documents reduced and only 1 over 4 clusters are visible). By default, every user can be a Reduce-evaluation user. The two firsts users accessing reduces pages (Reduce home page being http://HOST:BASEPORT/reduce) will be the chosen ones.

To restrict the list of users that can access Reduce in evaluation mode:

  1. Edit the security source filter:
    1. When cas security is configured: Open the Administration Console in your browser at http://HOST:BASEPORT+1/admin/#access-security-source?name=cas_filter
    2. Otherwise: Open the Administration Console in your browser at http://HOST:BASEPORT+1/admin/#access-security-source?name=app_login_filter
  2. In the Security source configuration, add a new group named reduce_eval.
  3. In this group add an Output token with value EXALEAD##OPREDUCEEVAL.
  4. Add a Filter to meet your requirements.
  5. In the xml file, software\datadir\config\CustomConfigs.xml replace the very last occurrence of EXALEAD##OPUSER (in the "reduce-eval" role) by "EXALEAD##OPREDUCEEVAL".
  6. Apply the configuration.

Reduce license

When you do have a genuine Reduce licence, by default NO users are allowed to access Reduce otherwise anyone could access the Reduce features. To explicitly choose the users that are allowed to access Reduce see the procedure below.

To whitelist users accessing OnePart Reduce:

  1. Edit the security source filter:
    1. When cas security is configured: Open the Administration Console in your browser at http://HOST:BASEPORT+1/admin/#access-security-source?name=cas_filter
    2. Otherwise: Open the Administration Console in your browser at http://HOST:BASEPORT+1/admin/#access-security-source?name=app_login_filter
  2. Click Cancel if button is activated.
  3. In Configuration > Config, expand the Group section, and find the Item with Name "reduce"
  4. Edit the list of filters, remove, edit existing ones or add a new one, to meet your needs.
  5. Click Apply.