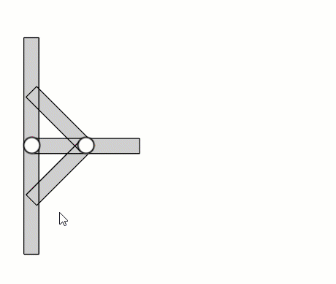
Select Corners for Trimming
-
In the work area
or Design Manager tree, Ctrl + select members.
-
Right-click and from the context toolbar, click Trim Member
 . .
Alternatively, from the Structure section of the action bar,
click Trim Member
.
- The Trim Member dialog box appears.
- The app automatically computes the related corners and displays them in the work area and in the Corners field of the dialog box.
-
In the dialog box, from the Corners field, click corners to
trim.
Alternatively, from the work area,
select one or more highlighted corners.
Note:
To clear all the selections at any point of time, reselect the corners and click
No Trim.
A toolbar becomes available in the work area
providing the shortcut menu for dialog box options. Click  and drag to reposition the
toolbar. 
Note:
You can switch to the 1 Member or 2
Members or, 3+ Members tab and select members for
the corner treatment.
- Optional:
Specify a member as a tool to trim the intersecting members. See Trim Tool Selection.
- Optional:
Select members to perform body trim. See Perform Body Trim on Members.
-
Select planar members to trim. See Trim Planar members.
-
Click
 . .
Trim Tool Selection
-
In the Trim Member dialog box, click Set a member
as trim tool
 to enable specifying the trim tool manually. to enable specifying the trim tool manually.
Alternatively, in the work area,
from the shortcut toolbar, click Set a member as trim tool
. Note:
Do not click the above option to use the default trim tool.
-
From the shortcut toolbar, do the following:
-
Click the navigation arrows to select a member to use as a trim tool.
-
From the trim type list, select Trim Tool
.
The selected trim tool member appears in the Trim tool
field of the dialog box.
Perform Body Trim on Members
-
In the Trim Member dialog box, click in the Miter
and Body trim members.
-
In the work area,
from the shortcut toolbar, do the following:
-
Click the navigation arrows to select a member.
-
From the trim type list, select Body trim
 . .
-
Repeat the steps a and b for each
member you select for body trimming.

The names of the selected members appear in the Miter and Body
trim members field of the dialog box.
- Optional:
Select Planar trim to tool member to trim the selected trim
tool and from the work area,
select a trimetric plane, reference plane, or face of an adjacent member as a reference
to cut the trim tool member.
-
Use Body trim order navigation arrows to change the member
sequence.
The first member in the order as a trim tool for other members. Note:
You can perform
a body trim:
- When no member is selected as a Trim tool.
- To Miter trim the two members selected for
Body trim.
- On more than two members at a time.
Trim Planar members
-
In the Trim Member dialog box, click Planar trim
members and from the shortcut toolbar, do the following.
- Click the navigation arrows to select a member.
- From the trim type list, select either Planar - First
contact or Planar - Full contact. See Trim Type Options
- Repeat the steps a and b for each
member you select for Planar trimming.
The names of the selected members appear in the Planar trim
members field of the dialog box. 
- Optional:
To apply the same corner treatment for the selected members, select Use
Common Planar trim treatment check box. See Trim Type Options.
This option is available only for Planar trim members. You
can individually specify the Trim Type for the planar trim member
from the Planar trim details menu.
- Optional:
To specify a reference for the trim tool, do as below:
- Select Use Common Planar trim treatment check box.
- From the Trim Type list, select the planer trim type. See
Trim Type
Options.
- Click in the Planar trim reference field and from work area, select a trimetric plane, reference plane, or face of an adjacent member.
Depending on your selected reference, the material is added to or removed from
the trim tool member.
- Optional:
Specify the Gap value between the corner of a trim tool member
with respect to the selected reference.
This option is available only for Planar trim reference
option.
The Design Manager Tree displays the members with the trimmed corners.
|


