Managing the Visualization Quality | |||
| |||
-
From the Static and Dynamic
lists, choose a quality preset.
These presets are groups of settings that are provided by the app, or customized by the user.
Important: Recommended is applied by default because the quality preset is automatically computed based on your graphics card. If you apply another quality, you can recover the recommended configuration afterward by choosing Recommended in the list. Preset Description Low Provides the lowest quality. 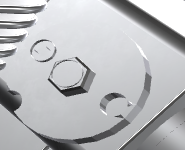
Medium Provides an average quality. 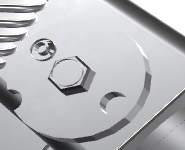
High Provides a better quality, with a minor impact on performance. 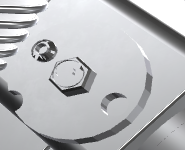
Ultra Gives the best visualization results, but there is a price to pay in performance. 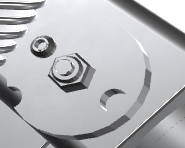
Recommended Settings are defined according to your graphics card to provide the best quality without compromising performance. Custom Applies customized settings. Important: - Static means that there is no interaction with objects. Dynamic means that you modify the viewpoint through handles, a rotation, a zoom, or an animation, for example.
- The quality with Dynamic settings cannot be better than with Static settings.
- Optional:
Use the link option to link or unlink the static and dynamic settings.

Applies the same quality to both static and dynamic settings. 
Removes the link between static and dynamic settings. -
To customize settings, click Advanced Settings.
The Visual Quality panel is refreshed to display the visualization settings you can customize.
-
Do one of the following:
- Choose a quality from the Static and Dynamic lists to apply the same quality to all the settings in the panel.
- Choose a quality in the list next to each settings group to apply the same quality to all the settings in the group.
- Click
 to expand a group and define a value for each setting in this group. When
you modify a value, the quality automatically switches to
Custom.
Any change you make immediately applies to the current widget.
-
To specify your own values for each setting, use the sliders, the lists, or the
boxes as required.
The following settings are available:
- Anti-aliasing
- Pixel culling
- Transparency
- Shadows
- Reflections
- Ambient Occlusion
- Depth Flickering Reduction
- Material
- Downsampling Factor
- Enable navigation cache
- Anti-aliasing
- Lets you specify the post-process to be applied.
Post-process Description NoAA No post-process is applied. FXAA Applies the FXAA (Fast approximate antialiasing) method. This post-process shader-based method smoothes out hard edges (even those inside polygons) in all pixels on the screen. SMAA Applies the SMAA (Subpixel morphological antialiasing) method for antialiasing. This post-process filtering is an enhancement of the FXAA algorithm and provides better results on border elements in the image. TAA Applies the TAA (Temporal antialiasing) technique. This technique uses the previous frames to converge to an aliasing-free image. It is basically a smart average between the N previous frames. As a consequence, it provides a better temporal stability for pictures compared to other techniques like MSAA (Multisample antialiasing). You have less flickering while moving or in the HTC Vive™. Important: - A ghosting effect may appear when TAA is activated.
- The TAA result depends on the camera orientation. For example, a nearly horizontal line does not give good results.
Iterative This antialiasing algorithm only converges on static frames (no camera movement or scene modification). The converged image is equivalent to the MSAA (Multisample antialiasing) algorithm. This method draws the scene multiple times and slightly jitters the position of the camera for each version. The resulting image is a blending of all the previously drawn versions. - Pixel Culling
- Lets you define the size of objects you want to hide or display in
your geometry.
Even if you do not want to move geometry, it is often useful to remove details you do not need to see. To do so, specify a high value to remove these details. Setting a high value also enables you to move large parts more quickly.
On the contrary, specifying a low value displays the details. For example, 2 means that objects whose size on screen is lower than 2 pixels are static.
- Transparency
- Lets you specify the transparency quality for objects.
Quality Description Alpha Blending Produces an effect similar to looking through clear glass. Use this option when you need to view several transparent objects located at different depths of a scene; objects are sorted according to their distance from the viewer. For example, looking through a car windscreen at other opaque objects inside the car. 
Weighted Average Improves the quality of transparent rendering, and renders mixed opaque/transparent geometry. This rendering technique also improves the visualization quality of edges: edges in the back are less visible than edges in the front, and their colors are blended with the geometry.
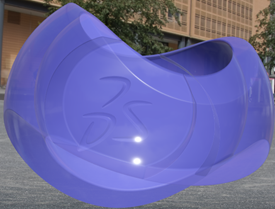
This technique applies to 3D geometry only and has no impact on other transparent geometries such as the Compass.
Important: For partially transparent objects, the higher the value, the better the result. For textures with opaque elements, a Low quality mode might produce a better result than a Medium one. In that case, select the Ultra mode that gives a better result whatever the object. - Shadows
- Specifies the shadow quality.
- Low
- Medium
- High
- Ultra
- Custom lets you define customized parameters for the shadows and filtering options listed below.
Option Description Allow ground shadows Simulates the shadows of the objects on the ground, provided that the current ambience supports this effect. 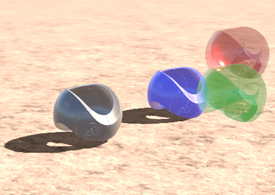
Allow inter-object shadows Enables shadow-casting between objects. When this option is activated, you can also use the Filtering to use and Filtering quality options. 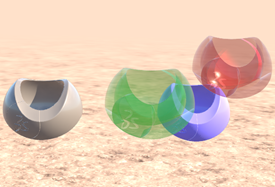
Allow transparent-object shadows Enables transparent objects to cast shadows on opaque objects and on the ground but they do not receive any shadows from other objects. 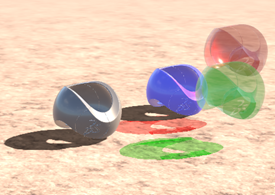
Filtering to use Lets you select the method to use when filtering the shadow map. - PCF-optimized where "PCF" stands for "percentage-closer filtering". This technique adaptively takes multiple shadow map samples instead of a fixed number of samples to improve visual quality while maintaining high performance.
- ESM (Exponential Shadow Map) uses an exponential function to filter the shadow maps to prevent antialiasing.
- Poisson applies Poisson distribution patterns to reduce the number of shadow map samples.
Filtering quality Lets you define the quality level to apply when filtering the shadow map. - Reflections
- Specifies the reflection quality.
- Low
- Medium
- High
- Ultra
- Custom lets you define customized parameters for the reflection options listed below.
Option Description Allow Reflections on ground Applies a mirror effect on the ground, and hidden objects are also reflected. Allow Reflections between objects Displays interobject reflections. - Allow Ambient Occlusion
- Displays shaded surfaces by considering light attenuation from
nearby actors. The theory is when an object is surrounded by many
other objects, it appears darker because less light can reach it.
- None: no ambient occlusion.
- Low
- Medium
- High
The higher the value, the more samples.
- Depth Flickering Reduction
- Improves the visual quality by reducing visual artifacts (called "Z-fighting" or
stitching effect) that may occur with overlapping models.
The scene is prerendered in the depth buffer, without rendering any colors. The depth buffer is a simple 2D image containing depth values of an individual pixel on screen. It is used for comparing the current pixel's depth value with the value already present in the buffer, before deciding to overwrite it.
Once the depth values have been retrieved, the scene is rendered again and:
- A bias is added to the computed z-values.
- Comparisons are made, but nothing is written to the depth buffer. Color values that fail the comparison are overlapped.
Overlapping zones significantly reduce visual flickering. However, there is a price to pay in performance because the frame rate is decreased. The bigger the model, the more significant the decrease.
Option is cleared Option is selected 
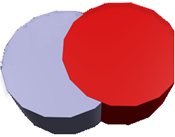
Important: This option may have no effect on small structures, and overlapping surfaces with high curvature.  By default, this option is
cleared.
 - Material
- Lets you specify the quality for the material visualization.
- Low
- Medium
- High
- Ultra
- Custom lets you define customized parameters for the material through the options listed below.
Option Description Metallic Flakes Quality Lets you tune the simulation quality of flakes (thin and highly reflective particles) at interactive frame rates when a Car Paint material is applied. The frame rate defines the number of images displayed per second (FPS). The higher the FPS, the better the result. Virtual Reality scenarios, for example, require a very high FPS.
- Low: no individual flake is visible, only a rough approximation.
- Medium: some flakes are visible, but not all of them.
- High: most of the flakes are visible.
- Ultra: all the simulated flakes are visible.
Default Material Quality Lets you control the rendering quality of geometries without dedicated materials. - Low: basic
- High: physical
- Ultra: physical with a clear coat.
- Downsampling Factor
- Lets you enhance the rendering performance by applying a downsampling factor to the image
displayed on screen. The image is generated with a lower resolution
to have better performance but with a lower visual quality (the
image looks slightly blurry.)
This option is especially relevant on laptops with a low-end graphics card. In this case, defining a high factor provides a good quality/performance ratio.
 By default, this option is defined to
1.
 - Enable navigation cache
- Lets you use the Navigation cache max size (MB) option.
When you refresh your browser page, the model (if available) is read from this database instead of being downloaded through the network. Thus, downloading and reloading a model is faster because the download requests are grouped into a batch file.
 By default, this option is selected.
 - Navigation cache max size (MB)
- Lets you specify the maximum size for the local database where your
downloaded models are stored.
Important: - To take into account the activation or deactivation of this option, you must refresh your browser page.
- The activation of the Enable navigation cache option and the maximum size you define are specific to a given http host. If multiple http hosts are used, these parameters cannot be shared, because there is no way for a given host to know the parameters defined on the other hosts.
- Optional: Click Cancel to restore the original values.
-
Click OK to store the new values, and recover them next
time you apply the Custom preset.
The Visual Quality dialog box closes.