Assistant | |
| |
Actions
Actions are categories of tasks (for example, restraints) that you perform to define and run a simulation. Actions are presented in a logical order; however, you do not always need to perform the actions in the order by which they are listed. In addition, some actions have prerequisite actions while other actions might be entirely optional.
To improve the display speed as you add, remove, and edit items for large models, the Assistant does not display the number of actions. In addition,
Connections are always optional  , and
Parts are complete
  if
at least one part is contributing to an assembly. You can define the size of your
model in .
Commands
The lower half of the Assistant provides easy access to commands related to your current action.
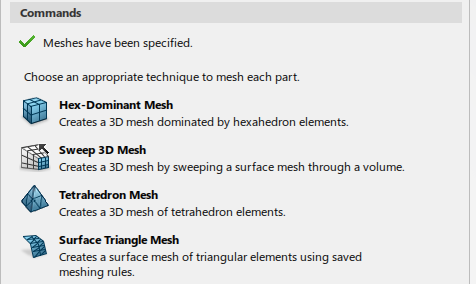
When you click any action in the upper half of the Assistant, the lower half of the panel displays options related to that action. For
example, when you click the Mesh action in the upper half,
the lower half displays a set of mesh-related commands. 
User assistance is provided in four sections:
- The first line shows that the mesh has been applied successfully. If this step was not complete, the status would be marked incomplete with a red circle icon and would indicate how you can complete the step; for example, "Mesh must be applied."
- The general category description appears next, describing what actions you must perform to complete the step. This description might also include an overview of how the tools in the commands list can help you satisfy those criteria.
- A set of commands appears under the general category description.
- Some categories might also include a tip at the bottom of the panel. Tips provide supplemental information that is not critical for your completion of the step. They can provide background and recommendations that help you make more informed choices as you define the components of your simulation.