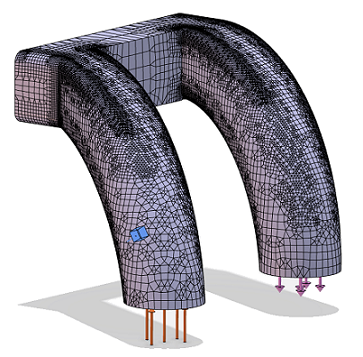
Customize the Mesh
-
From the tree, expand the Nodes and Elements node, then double-click
Hex Mesh.1.
-
Enter 6mm as the Maximum size, and
enter 1mm as the Minimum size.
-
Enter 30deg as the Minimum angle between
faces.
-
Select Add boundary layers to specify the distribution of
elements at the surface of the fluid domain.
-
Enter 0.2mm as the First layer
thickness, and enter 6 as the Number of
layers.
-
Expand the Options section, clear all selections, and select
Optimize surface treatment.
-
Click Mesh to start the meshing process.
Note:
Clicking Mesh starts the meshing process immediately;
clicking OK saves the dialog box settings and closes the dialog
box without meshing.
The PLM Update... window appears and displays the
meshing progress. This window closes automatically when the app
completes the meshing process.
-
Click OK.
-
Save your work.
Visualize the Mesh
-
Display a clear view of the mesh.
-
From the Display section of the action bar, click Visualization Management
 . .
-
From the Shape options, select Hide
 . .
The app
hides the duct part.
-
From the FE Model options, select
Show
 . .
The app
reveals the fluid domain mesh.
-
Click Close.

-
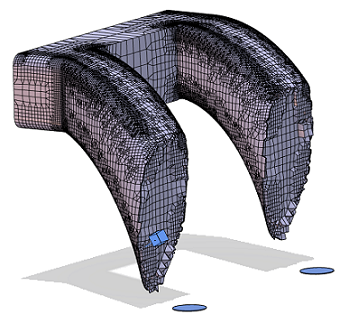
Display a cross-section of the mesh.
-
From the Display section of the Assistant, click Sectioning
 . .
-
From the Plane options, select
X-axis, Y-axis, or
Z-axis to specify the cutting plane.
The cutting plane is the plane normal to the selected axis.
-
If desired, click Reverse to display the mesh on the other
side of the cutting plane.
-
Clear Exact mesh cut to show whole elements on the cutting
plane.
The cutting plane appears jagged because this option preserves full-sized
elements at the location of the plane as opposed to displaying a true cross-section
of the mesh.
-
Inspect the density of the mesh in critical areas of the model.
For example, you can verify the number of boundary layer elements that you specified
when creating the mesh. Based on your inspection, you could refine or coarsen the mesh
to improve the results or performance, respectively. Your mesh should appear fine at
the surface and gradually coarsen toward the center.

-
Close the Sectioning dialog box.
|

