Refine the Local Meshes of the Plates | ||
| ||
-
From the standard area of the action bar, click Mesh
 .
Mesh Creation opens.
.
Mesh Creation opens. -
From the Mesh section of the action bar, click Mesh Part Manager
 .
.
The Mesh Part Manager displays all the mesh definitions in a model and provides you with a quick reference on the mesh status and several basic mesh parameters.
You can also use the Mesh Part Manager to edit, delete, remove, update, or control the display of meshes.
-
In the Mesh Part Manager, under the finite element model Ready A.1,
double-click the mesh representation of the bottom plate.
-
In the Local Specifications section, click
Local Mesh Size
 .
.
-
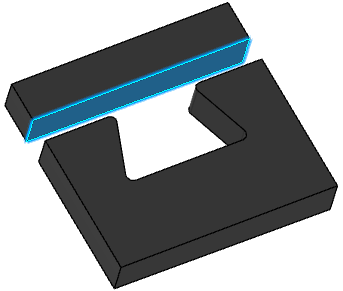
Select the seven faces of the groove, highlighted in the image below,
as the supports.
Tip: You can hide the O-ring to help you select the faces. Hover over the part in the 3D area, and press F7 to hide it. Press F8 to show the part. - Enter 0.488 mm as the Size, and click Mesh.
-
Click OK.
The app updates the mesh representation of the bottom plate and refines the mesh at the selected faces.
-
In the Local Specifications section, click
Local Mesh Size
-
Similarly, refine the mesh for the bottom face of the top plate.