Creating Canonic Hoppers

You can create canonic hoppers.

Canonic hoppers can be conical, cylindrical, or planar. Their defining sketches can be on parallel planes. They may be open or closed; they must have similar shapes, and must be composed of arcs of circles and straight segments. For each segment or arc in a sketch, there must be a corresponding segment or arc in the other sketch. In case of arcs, the projection of their centers on the other sketch plane must match.

Note: You can also create and edit surfacic hoppers with a 3D shape created previously. For more information about the different ways of creating surfacic hoppers, see Create Free Surfaces from a Ruled Surface and Create Free Surfaces from a Double Curvature Surface.


Before you begin: Sketch two profiles defined by an edge.
  1. From the Model section of the action bar, click Hopper .
  2. Select the sketches for the First profile and Second profile.
  3. To define the opening line, select a start point and an end point on each sketch.

    A preview of the hopper appears.


    • The green arrow indicates the fixed side for unfolding: the hopper may be unfolded from the side opposite to the arrow. You can change the unfolding direction by clicking either the arrow or Invert fixed area side.
    • The red arrow indicates the direction for thickening the hopper. You can change the thickening direction by clicking either this red arrow or Reverse .
  4. To create a hopper between two profiles with different approximation parameters, click Generate lofted bend.

    The profiles can be open or closed, have sharp or smooth corners, or circular sections. Sharp corners are smoothed.

  5. Define the approximation parameters:


    : number of segments

    : chord tolerance

    : segment length

    : segment angle

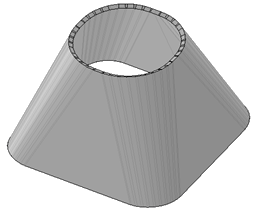
    A square to round hopper would look like this:

  6. From the standard area of the action bar, click Fold/Unfold to unfold the hopper.