Creating Rolled Walls | |||
| |||
-
From the
Model section of the
action bar,
click
Rolled Walls
 .
.
-
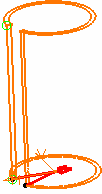
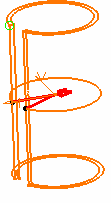
In the
Profile box, select the circular sketch and
define the limits.
Both lengths indicate the location of Limit 1 and Limit 2.
-
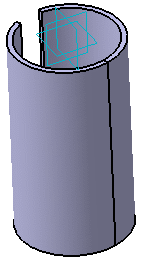
Select the profile positioning option:
Option Description  Bottom
Sets the profile at the bottom position of the wall thickness.  Middle
Sets the profile at the middle position of the wall thickness.  Top
TopSets the profile at the top position of the wall thickness. - Optional:
To extend the material on both sides of the sketch, click
Mirrored Extent
 .
.
-
Click
OK.
-
From the
standard area
area of the
action bar,
click
Fold/Unfold
 .
.
You can unfold the rolled wall from its start point, middle point or end point.