Working with Display Lists

You can create, edit and store a graphical storage set containing selected geometry within a part model.

This task shows you how to:


Before you begin: Open a Part with a set of geometric elements.

Create Display Lists

Create a new display list and copy elements.

  1. Click Display Lists in the App Options panel.
    The Display Lists dialog box is displayed.
  2. Click New empty Display List to create a new display list List.1.
  3. In Defined Display Lists, double-click List.1.
    The entry changes to a text box.

  4. Rename 'List.1' to 'Rear Fender' and return to the Default display list.
    In Target Display Lists, the new display list Rear Fender is now selected.
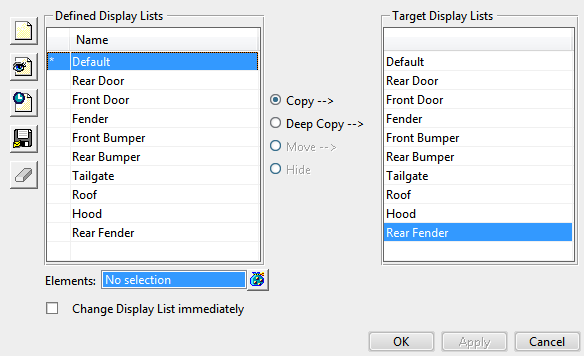
  5. In the tree, select the geometrical set Rear Fender and click Apply.
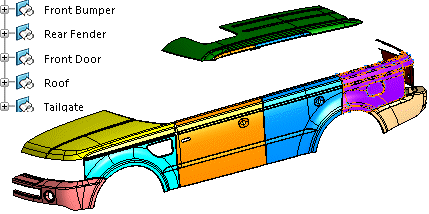
  6. In Defined Display Lists, double-click the Rear Fender display list.
    Only the geometrical set Rear Fender is now set to Show.
  7. Click Save active Display List to save the Rear Fender list.

Move Elements

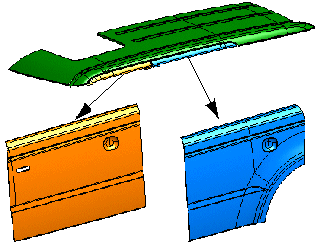
The Roof display list contains some elements belonging to other lists into which they shall be moved.

Display List Roof
Display List Front DoorDisplay List Rear Door
The orange and blue surfaces belong to the display lists Front Door and Rear Door.

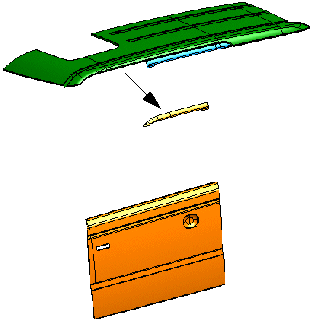
  1. In Defined Display Lists, select the Roof list and in Target Display Lists the Front Door list.
  2. Select Move -->.
  3. In the tree, select the geometrical set FrontDoor.2.
  4. Click Apply to move the geometrical set FrontDoor.2 to the Front Door list.
    Display List Roof
    Display List Front Door
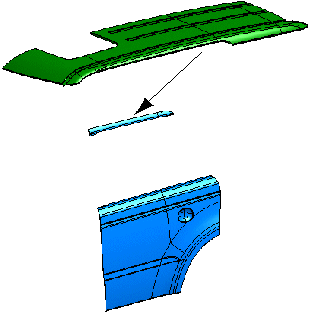
  5. Select the Rear Door list as target list and the geometrical set RearDoor.2 in the tree.
  6. Click Apply to move the geometrical set RearDoor.2 to the Rear Door list.
    Display List Roof
    Display List Rear Door
  7. Select successively the Front Door and Rear Door lists and click Save active Display List to save the modifications in both lists.