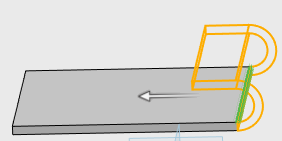
Creating Hems | |||
| |||
-
From the Sheet Metal section of the action bar, click Hem
 .
.
-
Select an edge or a spine.
When you select an edge, the contextual icon
 Select Tangent Edges appears near the selected edge
in the geometry. You can click it to select all tangent edges to the selected
edge.The selection field is updated with the selected edge and a preview of the hem is created.
Select Tangent Edges appears near the selected edge
in the geometry. You can click it to select all tangent edges to the selected
edge.The selection field is updated with the selected edge and a preview of the hem is created.To remove the selections made, click
 , and select
Clear all selects.
 -
Set the hem length by dragging the handle or enter a length value.

When you drag the handle, you can see the preview. Shaded preview appears on the release of the handle.
- Optional:
Select Trim support
 to trim edges that lie on
planar supports only.
- Optional:
To reverse the direction of the hem, click Flip
Orientation
 .
.
-
Optional: From the Limiting Geometry, select
the reference 1 and reference 2 to limit the geometry.
Note: Choose the Limiting Geometry references from one of these: reference plane, end vertex of an edge, or point on the edge.
-
Optional: From the Bends, find the Override
default settings check box and enter the required radius and K-Factor.
Linked to SheetMetal parameters
 shows that the given parameter is driven from global sheet metal parameters. You
can click to unlink it.
  shows
that the given parameter is a local or custom value. You can click
Relink All to reset all values to global sheet metal
parameters.
-
Click
 .
.
 Note: You can use equations for all numeric parameters. Click the dimension text. The dimension text becomes editable. Type = in the input field, to open the Equation dialog box and enter a formula or number. For more information, see Equations.