Extruding a Subdivision Face
-
From the Subdivision section of the action bar, create a 2D or 3D subdivision object.
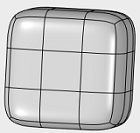
Note: A 3D subdivision box is used in this procedure.
-
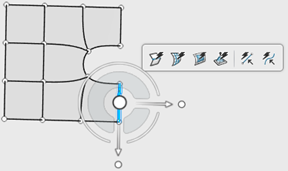
From the Subdivision section of the action bar, click Extrude
 .
A command toolbar appears with the following commands:
.
A command toolbar appears with the following commands:
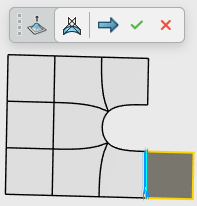
Command Description Command Icon On a subdivision object, when you launch a command with a command toolbar, the active command icon is displayed on the drag handle of the toolbar. In the screen capture above this table, the Extrude icon is shown. 
Accept and Continue. Accepts the current result and continues in the current command. 
OK. Accepts the current result and closes the command. 
Cancel. Cancels the command. Note: Press Esc to exit the command, double-click to apply the current command and use the command again. -
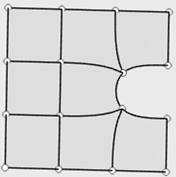
Select one or more faces in the subdivision mesh to extrude.

-
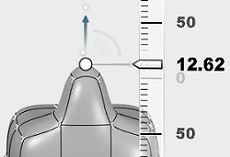
Click . You can also customize the extruded face by selecting faces and points
on the extruded face and perform another edit.
-
Click
 .
.
 button along with the other commands.