-
From the
Subdivision section of the
action bar,
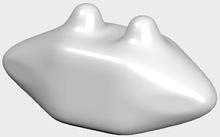
create a subdivision object.
Note:
A 3D subdivision box is used in this procedure.
-
From the Subdivision section of the action bar, click Symmetry On
 . .
Note:
You can also access the Symmetry command from the Subdivision
quick command context toolbars.
-
In the Symmetry dialog box, under Symmetry
Entities, select a plane, an edge and vertex, two adjacent
edges, or three vertices to use for the symmetry plane.

After selecting the plane, you have the option to flip which side to use as
the base. Click  to flip the direction. This is relevant when the
plane is not centered on the subdivision or a side already has unique
features. to flip the direction. This is relevant when the
plane is not centered on the subdivision or a side already has unique
features.
- Optional:
Click the arrows in the plane to select the base plane.
-
Click
 in
Symmetry dialog box. in
Symmetry dialog box.
-
Apply the subdivision modifications.
Changes made on one side of the selected plane are applied
to the other side of the plane.
-
Click
 . .

|
