Creating a Subdivision Torus | ||
| ||
-
From the
Subdivision section of the
action bar,
click
Torus
 .
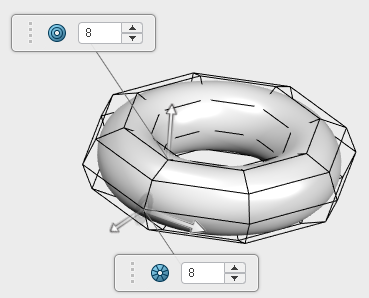
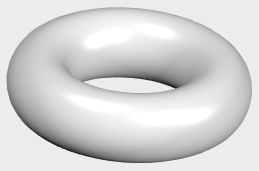
A torus is displayed in the work area.
 -
Select a plane or planar face for the subdivision.
Note: Repeatedly press Tab to cycle through the orientation of the subdivision on the various planes.
- Click in the work area to place the torus in the approximate location you want.
-
Optional: From the work area, in the Freeform
dialog box, do the following to adjust the end conditions of the feature:
- Click Midplane to extend the feature equally in both directions from the sketch plane. This specifies overall length.
- Select Flip to reverse the orientation of the feature and direction of the pull.
- Drag the Scale slider to scale the size of the subdivision body. It is set to 100 by default.
-
Click in the text boxes and enter the number of subdivision in the
mesh cage.

- Drag the arrows to define the size and width.
-
Click
 in
FreeForm dialog box.
- Optional: Drag the Robot arrows to position the torus.
-
Optional: Drag the mesh points and faces to customize
the shape of the torus.
To assist with selecting the mesh entities, the following options are available:
- For faces, press i or o to select a face loop around the subdivision. Click near an edge of the face to select the direction of the loop.
- For edges, press i to select edge rings around the subdivision, or press o to select edge loop around the subdivision.
Option Description 
Knit to solid. Knits the current model to a solid. 
Transparency. Sets the transparency of the subdivision. When Transparency is selected, a slider appears allowing you to set the transparency from 0 to 100 percent.
 Note: When the Transparency is not selected, the subdivision is 100 percent opaque.
Show surface only. Displays the mesh surface. 
Show cage and surface. Displays the mesh cage and surface. 
Show cage only. Displays the mesh cage. 
Show bounding box. Displays the outermost dimensions of the current active subdivision body. 
Select only visible elements. Filters out the mesh items in back, not visible in the display. 
Select external geometry. Allows selection of geometry external to the subdivision environment. 
New selection. Enables a new selection. Note: This is applicable only for box selection.
Add to selection. Adds any subsequent selection to any existing selection. Note:- Add to selection is applicable only for box selection.
- Shift + box selection is the shortcut for this ability.

Subtract from selection. Removes any subsequent selection from any existing selection. Note:- Subtract from selection is applicable only for box selection.
- Alt + box selection is the shortcut for this ability.

Any Entities. Selects any mesh entities. 
Vertices. Selects vertices. 
Edges. Selects edges. 
Faces. Selects faces. Note: Press o to select the faces around the subdivision. Click near an edge of the face, to select the direction of the loop.
Edge Rings. Selects the ring edges of a loop. Note: Press i to select the ring around the subdivision.
Edge Loops. Selects the edge of a loop. 
Face Loops. Selects the faces of a loop. Note: Press o to toggle the direction of the loop.
Exit the environment. Exits the environment. -
Click
 .
.
