Creating Basic Draft Features | |||
| |||
-
From the Refine or the Essentials
section of the action bar, click Draft
 .
An arrow appears on a plane, indicating the default pulling direction. By default, the Constant
 draft type is active.
 - You can either select each face to be drafted, explicitly, or use selection by neutral face.
-
While using selection by neutral face method, select the appropriate neutral
element.
This selection allows the app to detect the face to be drafted.
The neutral element is displayed in purple color and the neutral curve in pink color. The faces to be drafted are in dark red.
The pulling direction is now displayed on top of the part. It is normal to the neutral face.
Controlled by reference check box is now available and is selected by default. If you edit the element defining the pulling direction, this option modifies the draft accordingly.

- In the Angle box, type the value or use the arrows to change the angle value. By default, the angle value is 5 degrees. The app displays the new angle value in the geometry.
- Click More to access additional options.
-
The selected element is displayed in the Limiting
Element(s) box.
The arrow points to the portion of material to be kept to perform the operation.
Important: Ensure that limiting elements intersect neutral curves. If they do no intersect the app does not trim draft features. 
- Select another limiting element.
-
Click the arrow to reverse its direction, and therefore retain the opposite
side of the feature.

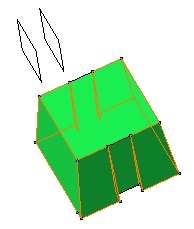
The faces are drafted but the areas included between both limiting planes have not been modified, as specified through the limiting element option.
Important: In some cases, you can only select a group of faces generated by the draft and not one particular face of the draft. It happens when you create a pad, add a draft on it and then add another draft that is based on the face of the pad. 
-
From the Material Options list, select one of the
following options:
- Add and Remove: computes both, the material to be added and the material to be removed.
- Add Only: computes only the material to be added.
- Remove Only: computes only the material to be removed.
Note:Add Only and Remove Only mode are effective only when there are more than one smooth set of faces to draft. For one smooth set of faces, you can either add or remove the material.