Create a Snapshot
-
From the tree, click
Traceability
 to display the traceability model. to display the traceability model.
-
From the properties area, click Create Snapshot
 ,
and then click OK to close the Create
Snapshot dialog box. ,
and then click OK to close the Create
Snapshot dialog box.
In the Snapshot folder of the tree, your
snapshot is created in a .traimage format. 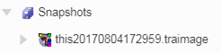
- Optional:
To change the default name, click
Rename Snapshot in the properties area.
-
Back to the coverage view, modify your model (for example, you can add or
remove links).
-
Repeat Step 2 to create a second snapshot.
- Optional:
If needed, click
Delete Snapshot in the properties area.
Compare Snapshots
-
In the Snapshot folder of the tree, select a first
snapshot. This snapshot will be compared to traceability and with other
snapshots of the same scope.
-
From the properties area, click Compare Snapshots
 , and then click OK to close the Compare
Snapshots dialog box. , and then click OK to close the Compare
Snapshots dialog box.
-
From the
Comparison tree tab, select a second
snapshot.
Differences are displayed in the work area. The details of the compared snapshots are displayed in the properties
area.
-
From the
Comparison tree tab, select another
snapshot.
The comparison is computed between the first snapshot and
your last selection.
-
To filter the tables, click Filter
 , and then select one of the proposed
attributes. , and then select one of the proposed
attributes.

-
To display a summary of the comparison, click Summary (second
bullet) in the navigation bar.
|