Using a Bounding Box | ||
| ||
-
To make a trap selection in the 3D area, click
Trap Mode Selection
 and do the following:
- Define the cuboid with a trap.
- Use the Robot to manipulate the cuboid.
- Resize the trap in the 3D area if needed.
- Click Reset to delete the current box and create a new one. The Cancel and OK buttons are disabled.
- Click Initialize to create a bounding box from the point cloud’s bounding box.
Note: You can use the Trap mode from the Extract and Hide commands only. It is not available when you launch the Bounding Box command from the Tools section. -
To switch mode and select a type of trap, click Volume Selection
 and do the
following:
and do the
following:
-
Select a volume, a surface or a closed curve.
As a result, the volume is copied. The closed surface is converted into a volume. The external boundary of the open surface is extracted, then projected and extruded like the closed curve. The closed curve is projected on the XY plane and extruded along Z.
-
If no element exists or you want to create a new one, click
 in
the Element box.
in
the Element box.
-
Select a volume, a surface or a closed curve.
-
To change the type of trap feature, click Alignment Selection
 and do the
following:
and do the
following:
- Select an existing alignment.
- Select a start or/and end point to restrict the alignment area.
-
If no element exists or you want to create a new one, click in
the Element box.
- Specify the width used to create the rolling offset.
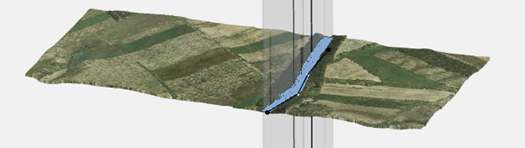
If satisfied with your selection, click OK and you obtain a 3D bounding box along the alignment: