Retrieve Source Objects Using File Input
This task explains how to select a coexistence profile.
-
Follow the procedure described in
Connecting to an ENOVIA VPM V5 Content Source.
-
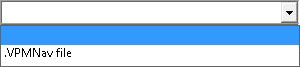
Click the
Input file type list and select the .VPMNav
file:
-
In the
Input file path field, specify the location
of your input file using the push button on the right.
The
Run button, in the bottom right-hand corner
of the dialog box, is now enabled.
-
If you are going to launch the batch immediately, provide the
information regarding report generation in the
Report directory and
Report name fields.
-
You can now either:
Retrieve Source Objects Using a Database Search
This task explains how to select a coexistence profile by
searching for an object in the appropriate provider database.
-
Run the batch.
The
CoexistenceBatch dialog box appears:

-
Select the coexistence profile or scenario in the
Coexistence Profile drop-down list at the
top of the dialog box.
This list contains two types of information:
- XML profiles i.e.
upward or downward
- structural
information i.e. upward scenarios such as "SMT to 3DExperience" or downward
ones such as "3DEXPERIENCE
to ENOVIAvpm").
-
If you select a downward XML profile, the
Advanced preferences... button, just to the
right of the
Expand all descendants check box, is
activated, allowing you to export data in
As Result or
As Spec format.
Notes:
- Once you have
selected a profile from the drop-down list, the
Read input from parameter file...
option (in the contextual menu displayed by right-clicking within the dialog
box) is disabled. If you select structural information in the drop-down list,
Upward Scenario(s) for example, you can then use that option. Conversely, if
the
Coexistence Profile list is grayed out
preventing you from making any selection, a profile has already been selected.
Only one XML profile can be selected.
- Once the data has
been loaded in the batch, a list of the data items is shown and the
Objects to process option in the
contextual menu is activated with two options:
Select all and
Remove.
Set the Expand Level
Note:
If you use the File Input option, you cannot perform the steps
described below.
You can find out how to set the expand level correctly.
-
If you want to guarantee the integrity of transferred data, keep
the
Expand all descendants check box selected.
-
If you want to do an expand to a limited level, make sure the
Expand all descendants checkbox is not
selected then enter the appropriate level in the
Expand depth box. The expand depth level
ranges from 0 through 25. Note that an expand level set to 0 implies that the
expand will be applied to the root only.
-
If you want to do an expand on the full range depth, select the
Expand all descendants checkbox.
Notes:
- By default, when
running the batch, the
Split options are taken into account.
For more information, see
Performance.
- By default, when
an assembly node is sent to
3DEXPERIENCE
using DBDI, the whole branch beneath the node is sent as well. The
Expand depth option allows some
refinement with sources implementing the Structure exposed assemblies. In
ENOVIAvpm
and
ENOVIA VPM V5,
it enables you to select expansion depth in the assembly branch and only
applies to Structure exposed branches. When a blackbox document is encountered,
the full recursive logic applies to the leaves involved.
- Some general
information on your PLM Batch execution and a report with the global results of
the batch are generated in the report directory.
Use Multiprocessing
Note:
If you use the File Input option, you cannot perform the steps
described below.
The coexistence batch may require lengthy processing times. To
alleviate this problem, it is possible to define a whole set of computers
enabling a simultaneous database design import via different subprocesses.
Before you begin: Make sure that the
same environment is defined for all processes. Both the code level and the
settings must be the same.
|
