Creating a Dashed Weld

You can create and break a weld into multiple segments to cover the entire length of the open guide curve. Once the dashed weld is created, its specifications can be extracted for a drawing in Drafting.

Use one of the three different Dashed Weld creation modes to design and place the segments (referred to as instances).

This task shows you how to:

Define Instances and Length

You can define a number of instances and the length of these instances.

  1. Click the weld creation command to define the guide curve along which the weld will be propagated, and select the faces in any order.

  2. Specify the parameters of the weld.
  3. Click the Type tab and select Dashed.
  4. Select Instances & Length.
  5. Enter the number of instances.
  6. Enter the length to assign to each instance.
  7. To specify how to place the first instance, select Weld First or Space First.
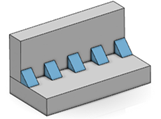
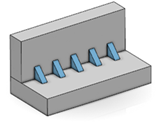
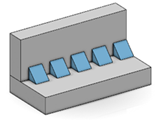
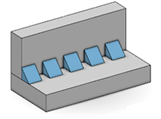
Example of a Dashed Weld Created with Weld First

Example of a Dashed Weld Created with Space First

Define Instances and Spacing

You can define a number of instances and the spacing between them.

  1. Click the weld creation command to define the guide curve along which the weld will be propagated, and select the faces in any order.

  2. Specify the parameters of the weld.
  3. Click the Type tab and select Dashed.
  4. Select Instances & Spacing.
  5. Enter the number of instances.
  6. Enter the spacing value.
  7. To specify how to place the first instance, select Weld First or Space First.
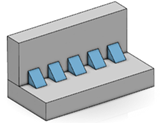
Example of a Dashed Weld Created with Weld First

Example of a Dashed Weld Created with Space First

Define Spacing and Length

You can define the spacing between the instances and their length.

  1. Click the weld creation command to define the guide curve along which the weld will be propagated, and select the faces in any order.

  2. Specify the parameters of the weld.
  3. Click the Type tab and select Dashed.
  4. Select Spacing & Length.
  5. Enter the spacing value.
  6. Enter the length value.
  7. To specify how to place the first instance, select Weld First or Space First.
  8. Optional: To invert the start extremity of the guide curve, select Invert.

Example of a Dashed Weld Created with Weld First

Example of a Dashed Weld Created with Weld First and Invert

If you cannot create the dashed weld, change the spacing value or the length value so that the app can use a value greater than 1 to obtain a valid number of instances.