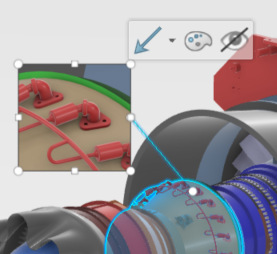
Creating a Magnifier Picture Marker | |||
| |||
-
Click Magnifier
 in the Instruction Authoring section of
the action bar.
Note: There are no aspect-ratio constraints provided by the command when you select the area for the Picture Marker. So each Picture created could have a different aspect ratio. Similarly, after creation, the Picture Marker can be resized without any aspect-ratio constraints.The default size is defined in (and can be changed through) Me
 > Preferences in the Authoring
section, and they are the same from the Picture Markers created by the Picture command.
-
Select the area on the screen.

- Select a location for the placement of the Magnifier Picture Marker.
-
Click anywhere in the 3D Geometry window to accept.
- They have the graphic properties (line color, line size, line type, and end type) which are the same as that of the most recently created Marker.
- They can be resized and repositioned after creation.Note: The original aspect ratio selected by you during the creation of the Magnifier Picture Marker is not maintained during manual resizing.
- The reposition/resize information is persisted in the View once updating the View.
- They display in the Dressup panel like other pictures.
