Installing 3DComment | |||
| |||
-
Change to the distribution directory.
The directory is:
- 3DComment.Windows64\1 on Windows
- 3DComment.Linux64/1 on Linux
then start the installation as follows:
- Windows: double-click setup.exe for the GUI mode or use StartTUI.exe for the TUI mode
- Linux: ./StartGUI.sh for the GUI, or ./StartTUI.sh
The installation procedure then starts:

Note: The dialog boxes are the same on both Windows and Linux.Click Next.
-
Specify the installation directory.
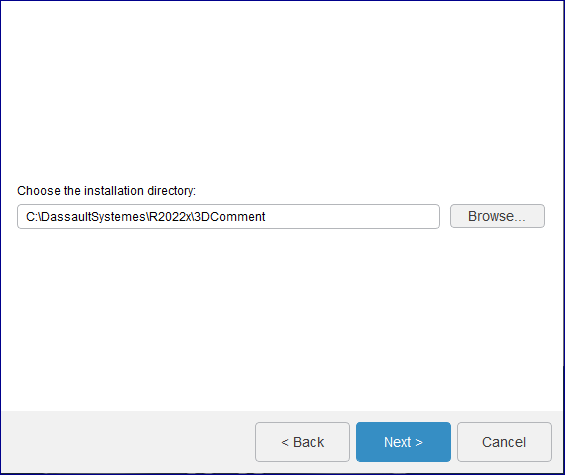
The default values are::
C:\DassaultSystemes\R2022x\3DCommenton Windows (remove any spaces before you confirm)/usr/DassaultSystemes/R2022x/3DCommenton Linux.
Note: The installation path cannot contain any space characters.If you accept the default destination folder, click the Next button to move to the next step, or click the Browse... button and select the desired destination folder. The folder you choose must be empty. You can also specify a new folder.
Click Next.
-
Specify if you want to install embedded Java.
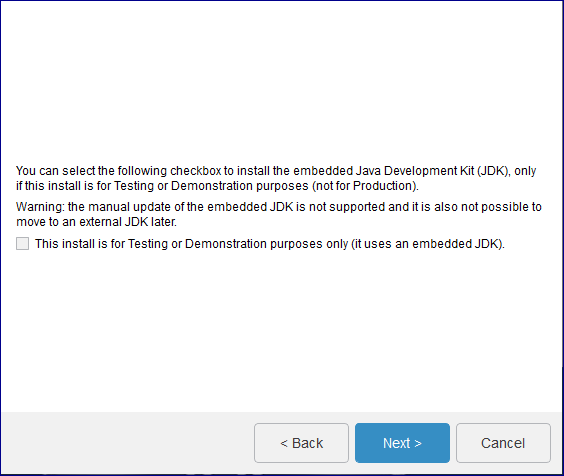
A JDK is required to install the service.
The This install is for Testing or Demonstration purposes only (it uses an embedded JDK) check box is not selected by default.
If you select the check box, the embedded JDK will be installed in:
C:\DassaultSystemes\R2022x\3DComment\win_b64\code\serverjreon Windows/usr/DassaultSystemes/R2022x/3DComment/linux_a64/code/serverjreon Linux.
Choosing embedded Java automatically implies also choosing embedded TomEE+.
Click Next.
-
If you did not check the This install is for Testing or
Demonstration purposes only (it uses an embedded JDK) check box,
you must specify the Java Home path.
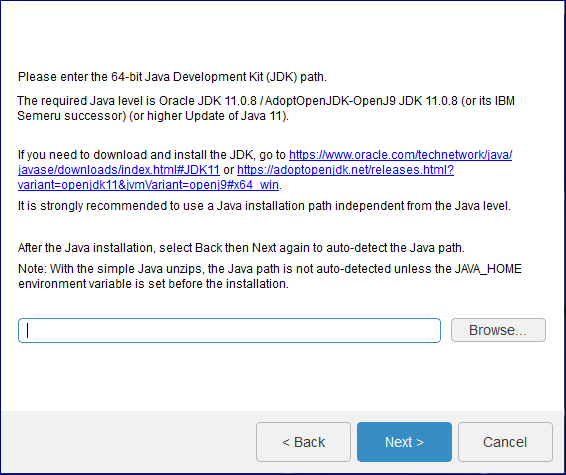
This is the location of your Java Development Kit (JDK) location.
On Windows, the Java location will be automatically detected.
If you use a local Certificate Authority, register your certificates in this Java store using the
keytoolutility.Click Next.
-
Specify the paths:
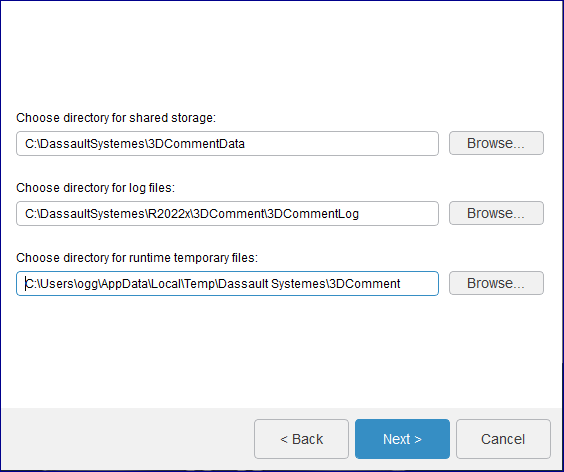
- the shared directory name to be used for storing data; the
default is:
C:\DassaultSystemes\3DCommentDataon Windows and/share/DassaultSystemes/3DCommentDataon Linux. This folder must already exist.We recommend that you use a mounted path for the shared directory. This is useful when large amounts of data need to be saved, and also facilitates management of a load balanced environment.
- the log directory containing application logs; the default is:
C:\DassaultSystemes\R2022x\3DComment\3DCommentLogon Windows and/var/log/DassaultSystemes/3DCommenton Linux - the temporary directory used at
3DComment
app runtime; the default is:
C:\Windows\Temp\DassaultSystemes\3DCommenton Windows and/tmp/DassaultSystemes/3DCommenton Linux.
Click Next.
- the shared directory name to be used for storing data; the
default is:
-
Specify the previously configured, dedicated URL endpoints for the
3DEXPERIENCE platform
services.
Note: Do not use uppercase characters in the URLs (standard form specified in RFC3986)

Before you do so, check the following:
- the URLs must contain Fully Qualified Domain Names (FQDN)
- the URLs must start with
http(s)://(and not ftp or other); note that all URLs arehttps://except Full Text Search - 3DPassport, 3DDashboard, 3DComment and 3DNotification must have a root URI if you install all the services on the same machine
- 3DCompass must have a root URI.
Sample URLs (if the services are installed on different machines) are:
- 3DPassport
service URL: the default is:
https://3dpassport.mydomain:443/3dpassport - 3DDashboard
service URL: the default is:
https://3ddashboard.mydomain:443/3ddashboard - 3DCompass
service URL: the default is:
https://3dspace.mydomain:443/3dspace - 3DComment
service URL: the default is:
https://3dcomment.mydomain:443/3dcomment - 3DNotification
service URL: the default is:
https://3dnotification.mydomain:443/3dnotification
The license control service URL (default is:
https://dsls.mydomain:4085) will only appear if the DSLicSrv.txt file is not present in C:\ProgramData\DassaultSystemes\Licenses (Windows) or /var/DassaultSystemes/Licenses (Linux). The DSLicSrv.txt file will then be created in the correct location, and will contain, for example:dsls.mydomain:4085. The user performing the installation must have write access to the directory containing the file.Click Next.
-
If you decided not to install embedded Java earlier, you will be
prompted to specify whether you want to install the TomEE+ application server
or not.
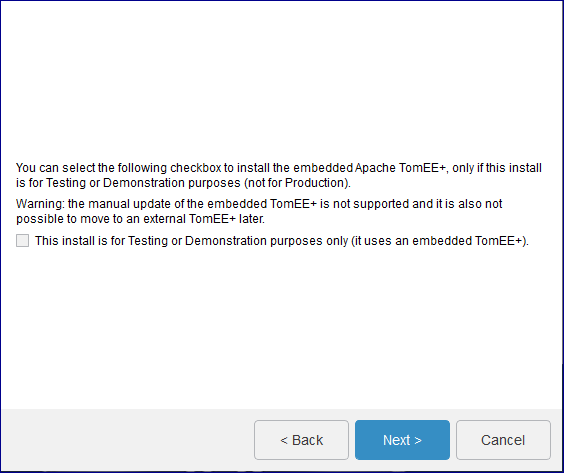
An application server is required to install the service.
Check the This install is for Testing or Demonstration purposes only (it uses an embedded TomEE+) option if you want to install the TomEE + application server integrated in the media. It will be installed in:
- <3DCommentInstallPath>\win_b64\code\tomee on Windows
- <3DCommentInstallPath>/linux_a64/code/tomee on Linux
On Windows, the 3DEXPERIENCE R2022x 3DComment TomEE+ service is created and started.
To start and stop embedded TomEE+ on Linux, launch:
<3DCommentInstallPath>/linux_a64/code/tomee/bin/startup.sh
<3DCommentInstallPath>/linux_a64/code/tomee/bin/shutdown.sh -force
Click Next.
-
If you decided to install the embedded TomEE+, specify the TomEE+ connection
port number.
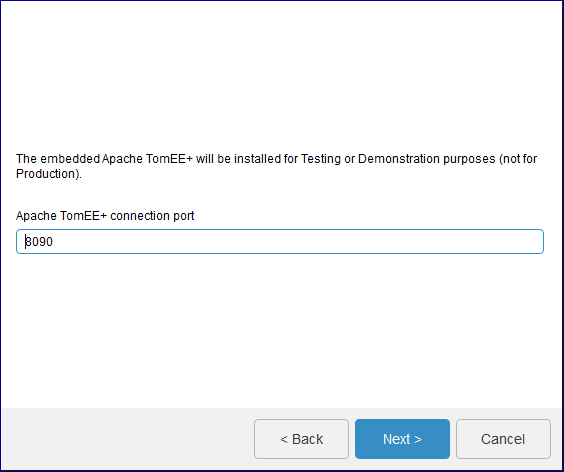
Choose a listening port number for TomEE to listen for HTTP requests. The default is 8080. The next available port will be used for shutdown.
If the port 8080 is busy, the installer will display the next available free port. If you specify a custom port value, the installer will check if it is available when you click Next.
An information box containing the following message appears:
Chosen Apache TomEE+ connection port 8090
Automatically fixed TomEE+ shutdown port 8091 (first free following port)
Click OK.
-
If you decided to use external TomEE+, specify the path of your existing TomEE+
installation.

Click Next.
-
If you are using embedded Java, specify the certificate location.
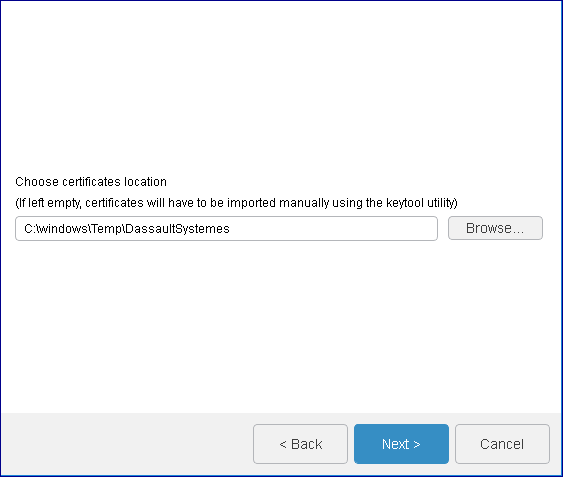
This directory contains the certificates to import into the JVM used by TomEE.
The default is:
C:\Windows\Temp\DassaultSystemeson Windows/tmp/DassaultSystemeson Linux.
If you leave the path empty, you can import the certificates manually later as a post-installation step. For more information see Installation and Setup: Install: 3DEXPERIENCE Platform: Reconfiguring the 3DEXPERIENCE Platform Installation.
Click Next.
-
Select the database type you are using and specify
the database connection parameters.
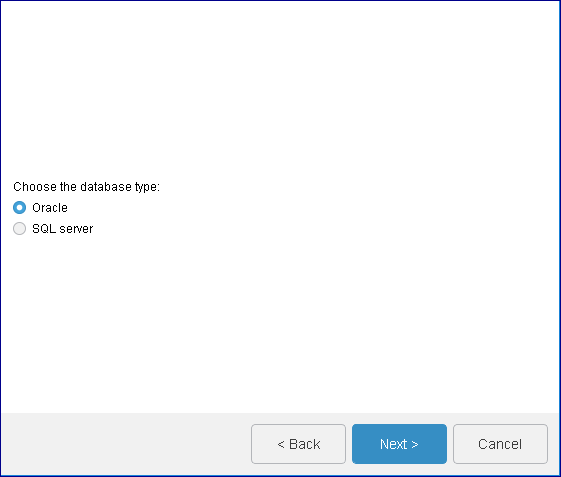
On both Windows and Linux, you can choose between Oracle and SQL Server.
-
On Windows and Linux, if you selected SQL Server, enter the SQL Server connection parameters:
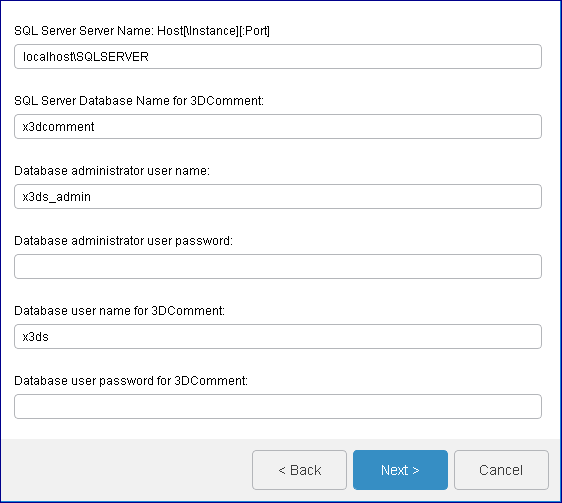
- SQL Server Server Name: Host[\Instance][:Port]
- SQL Server database hostname. The default is
localhost\SQLSERVER.Notes:- 3DComment uses a TCP/IP connection to SQL Server, so the 1433 port (or another) needs to be configured using SQL Server Configuration Manager.
- Indicate additional database connection properties required to support encryption for
instance:
localhost\SQLSERVER;encrypt=true;sslProtocol=TLSv1.2
Make sure the SQL Server certificate is imported in the Java keystore of the service.
- SQL Server Database name for 3DComment
- Database schema name you must already have created as explained in Create Databases and Database Users. The
default is
x3dcomment. It should be empty in the case of a fresh install from scratch. - Database administrator user name
- Database administrator user name. The default is
x3ds_admin. You must have created this user already with the appropriate permissions to the above database schema, as explained in Create Databases and Database Users. - Database administrator user password
- Database administrator user password.
- Database user name for 3DComment
- Database user name which you created already as explained in Create Databases and Database Users. The
default is
x3ds. - Database user password for 3DComment
- Database user password.
-
If you are using Oracle, specify the database connection parameters:

Specify the directory containing tnsnames.ora and the
Net service nameOR only the full service URL (//Host[:Port]/service_name)- The directory of tnsnames.ora
- Specify the
tnsnames.ora path. It is usually located
in
<Oracle_Home>/network/admin.Note: We recommend that you use the tnsnames.ora file method for specifying database name details. - Net Service Name (with tnsnames.ora) or //Host[:Port]/service_name
-
The default is
//localhost:1521/X3DCOMNT. - Database connection user name for 3DComment
- Database user name which you created already as explained in Create Databases and Database Users. The
default is
x3dcomment. - Database connection user password for 3DComment
- Database user password.
Click Next.
-
-
Select the Use as batch server check box for one and
only one 3DComment instance.
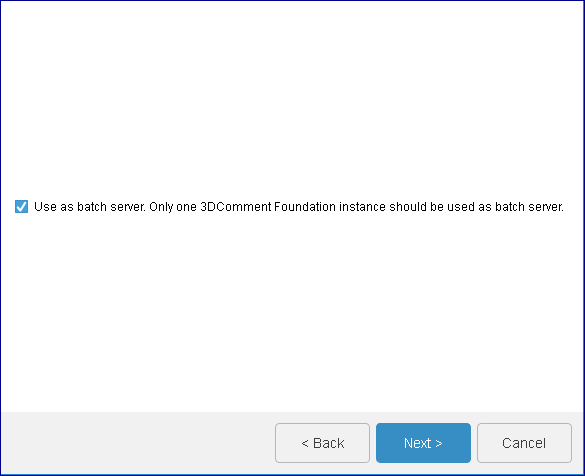
Click Next.
-
Review your installation choices, then click the Install
button to install the files.

You can consult the installation logs here:
- <3DCommentInstallPath>\InstallData\log on Windows
- <3DCommentInstallPath>/InstallData/log on Linux.
Installation log files are prefixed by the installation media name.
You should also consider the following logs for debugging or analyzing:
- embedded TomEE log directory:
<3DCommentInstallPath>\win_b64\code\tomee\logs on Windows
<3DCommentInstallPath>/linux_a64/code/tomee/logs on Linux
- external Apache TomEE default log directory:
<externalTomEEInstallPath>\logs on Windows
<externalTomEEInstallPath>/logs on Linux.
On Windows, the 3DEXPERIENCE R2022x 3DComment TomEE service is created and started if you chose the embedded TomEE.