Installing 3DPassport | |||
| |||
-
Procure the media for your operating system, and prepare to
install the software as explained in the
DS Installer Guide.
The name of the installation media is:
3DPassport-V6R2022x.Windows64.zipon Windows3DPassport-V6R2022x.Linux64.tar.gzon Linux
-
Untar/unzip the media to create the following directory:
3DPassport.Windows64on Windows3DPassport.Linux64on Linux.
-
Change to the distribution directory.
The directory is:
- 3DPassport.Windows64/1 on Windows
- 3DPassport.Linux64/1 on Linux
then start the installation as follows:
- Windows: double-click setup.exe
- Linux: ./StartGUI.sh for the GUI, or ./StartTUI.sh
The installation procedure then starts:
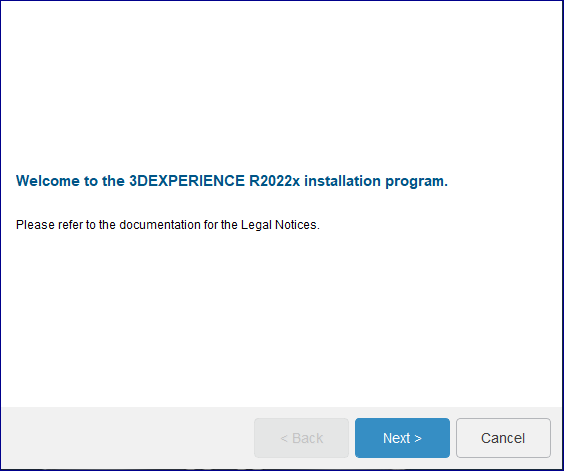
Note: The dialog boxes are the same on both Windows and Linux.Click Next.
-
Specify the installation directory.
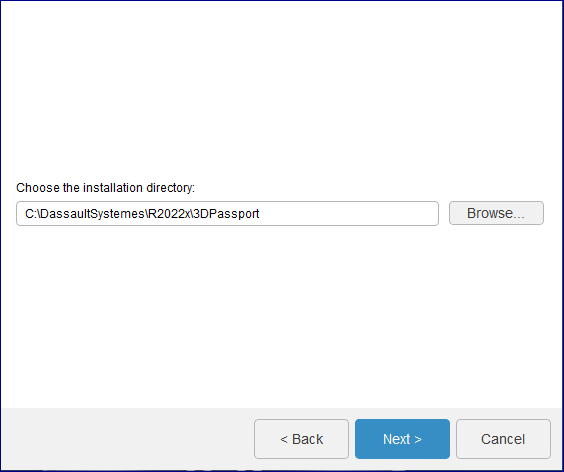
The default values are:
C:\DassaultSystemes\R2022x\3DPassporton Windows/usr/DassaultSystemes/R2022x/3DPassporton Linux.
Note: The installation path cannot contain any space characters.If you accept the default destination folder, click Next, or click Browse... and select the desired destination folder. The folder you choose must be empty. You can also specify a new folder.
Click Next.
-
Specify if you want to install embedded Java.
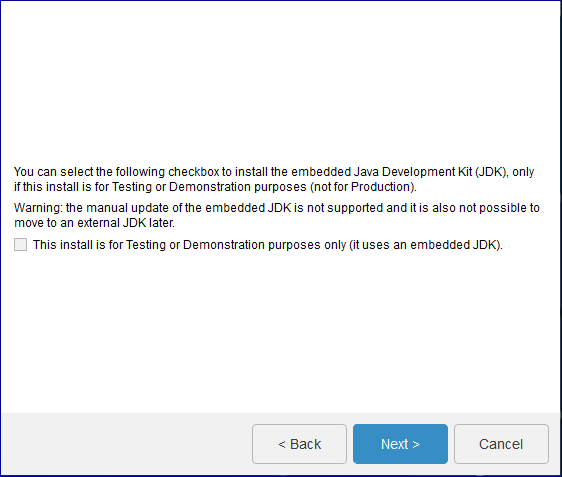
A JDK is required to install the service.
The This install is for Testing or Demonstration purposes only (it uses an embedded JDK) check box is selected by default.
If you select the check box, the embedded JDK will be installed in:
C:\DassaultSystemes\R2022x\3DPassport\win_b64\code\serverjreon Windows/usr/DassaultSystemes/R2022x/3DPassport/linux_a64/code/serverjreon Linux.
Choosing embedded Java automatically implies also choosing embedded TomEE+.
Click Next.
-
If you did not check the This install is for Testing or
Demonstration purposes only (it uses an embedded JDK) check box,
you must specify the Java Home path.
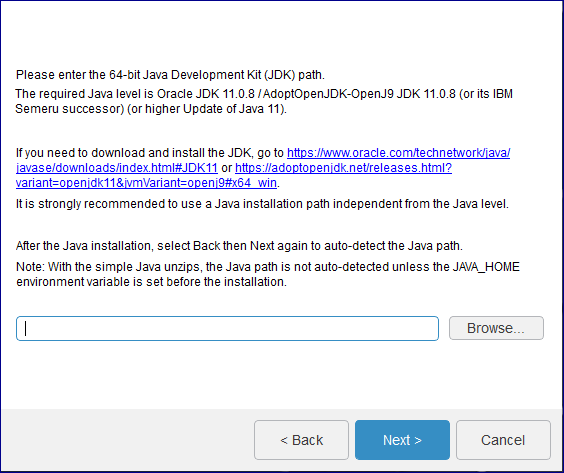
This is the location of your Java Development Kit (JDK).
On Windows, the Java location will be automatically detected.
If you use a local Certificate Authority, register your certificates in this Java store using the
keytoolutility.Click Next.
-
If you decided not to install embedded Java earlier, you will be
prompted to specify whether you want to install the TomEE+ application server
or not.
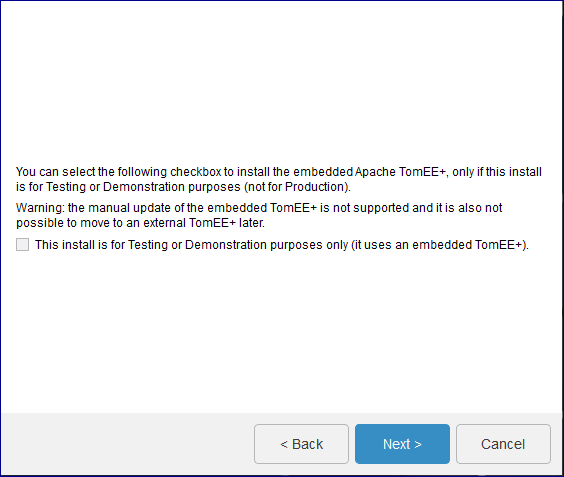
An application server is required to install the service.
Check the This install is for Testing or Demonstration purposes only (it uses an embedded TomEE+) option if you want to install the TomEE + application server integrated in the media. It will be installed in:
- <3DPassportInstallPath>\win_b64\code\tomee on Windows
- <3DPassportInstallPath>/linux_a64/code/tomee on Linux
On Windows, the
3DEXPERIENCE R2022x 3DPassport TomEE+service is created and started.To start and stop embedded TomEE+ on Linux, launch:
<3DPassportInstallPath>/linux_a64/code/tomee/bin/startup.sh
<3DPassportInstallPath>/linux_a64/code/tomee/bin/shutdown.sh -force
Click Next.
-
If you decided to use external TomEE+, specify the path of your existing TomEE+
installation.
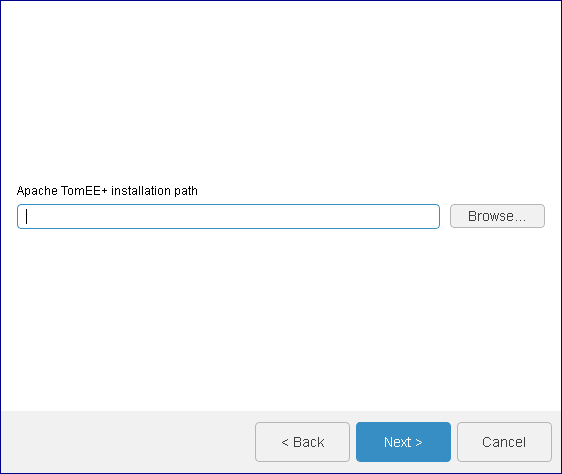
Click Next.
-
If you decided to install the embedded TomEE+, specify the TomEE+ connection
port number.
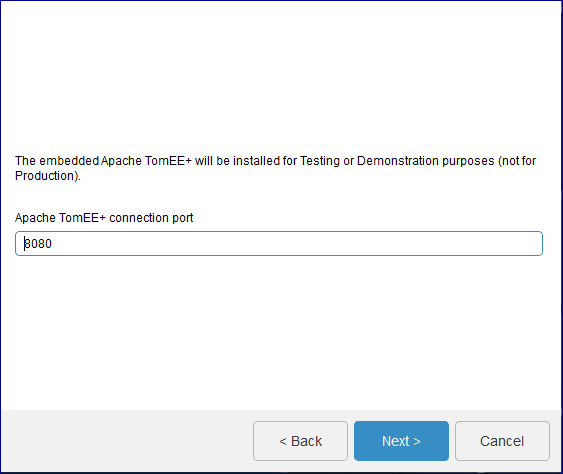
Choose a listening port number for TomEE+ to listen for HTTP requests. The default is 8080. The next available port will be used for shutdown.
If the port 8080 is busy, the installer will display the next available free port. If you specify a custom port value, the installer will check if it is available when you click Next.
An information box containing the following message appears:
Chosen Apache TomEE+ connection port 8080
Automatically fixed TomEE+ shutdown port 8081 (first free following port)
Click OK.
-
If you are using embedded Java, specify the certificate location.
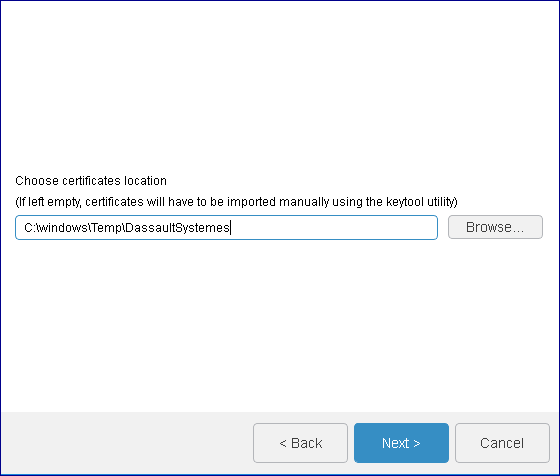
This directory contains the certificates to import into the JVM used by TomEE+.
The default is:
C:\Windows\Temp\DassaultSystemeson Windows/tmp/DassaultSystemeson Linux.
If you leave the path empty, you can import the certificates manually later as a post-installation step. For more information see Installation and Setup: Install: 3DEXPERIENCE Platform: Reconfiguring the 3DEXPERIENCE Platform Installation.
Click Next.
-
Customize the user login case.
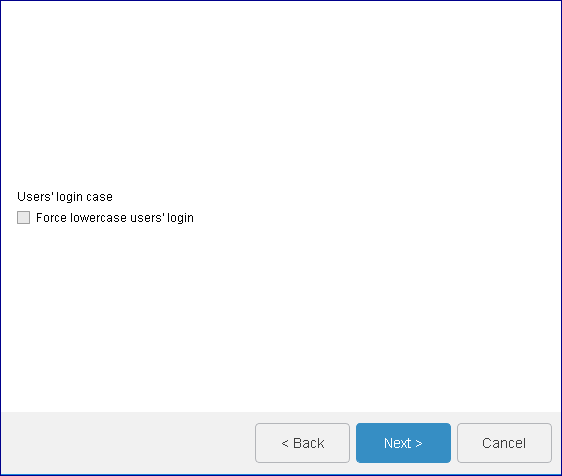
Select Force lowercase users' login check box if you want to configure the 3DPassport to force the user's login in lowercase.
The advantage of this option is: it forces the user's login (username) to lowercase when it is stored in the local database and retrieved by other applications. We recommend that you use this method during installation, unless you are migrating from an environment other than the 3DEXPERIENCE platform.
Click Next.
-
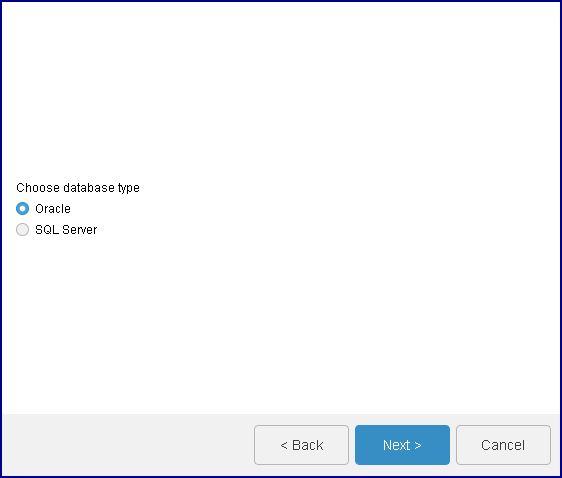
Select the database type you are using and specify the database
connection parameters.
-
On Windows and Linux, if you selected SQL Server, enter the SQL Server connection parameters:
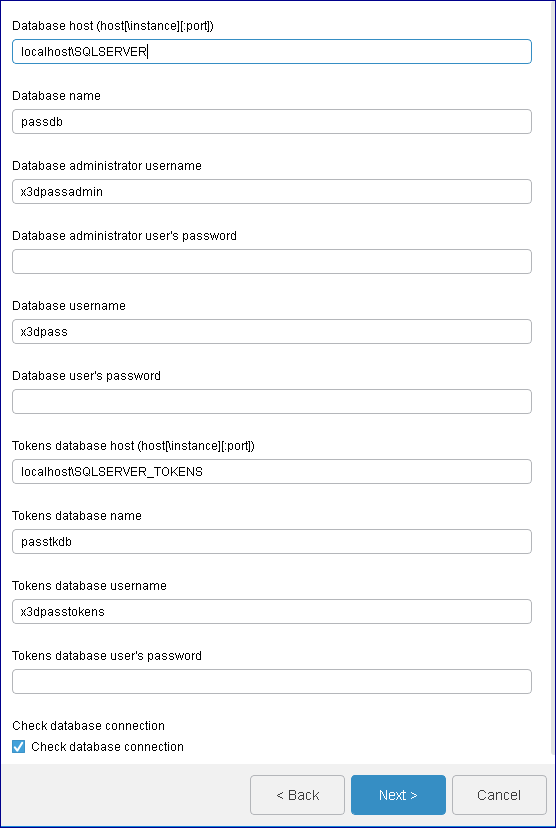
- Database host (host[\instance][:port]
- SQL Server database hostname. The default is
localhost\SQLSERVER, and if no port is specified the default one will be used (1433).Note:- 3DPassport uses a TCP/IP connection to SQL Server, so the default 1433 port (or another) must be configured using SQL Server Configuration Manager.
- Indicate additional database connection properties required to support encryption for
example:
localhost\SQLSERVER;encrypt=true;sslProtocol=TLSv1.2
Make sure the SQL Server certificate is imported in the Java keystore of the service.
- Database name
- Database name which you created already as explained in . The
default is
passdb. - Database administrator username
- Database administrator user name which you created already as
explained in Create Databases and Database Users. The default is
x3dpassadmin. - Database administrator user's password
- Database administrator user's password.
Warning: To change the Administrator and Password, use the Reconfiguration tool. For more information, see Installation and Setup: Install: 3DEXPERIENCE Platform: Reconfiguring the 3DEXPERIENCE Platform Installation. - Database username
- Database username which you created already as explained in
Create Databases and Database Users. The default is
x3dpass. - Database user's password
- Database user's password.
- Tokens database host (host[\instance][:port]
- Tokens database hostname. The default is
localhost\SQLSERVER_TOKENS, and if no port is specified the default one will be used (1433).Note:- 3DPassport uses a TCP/IP connection to SQL Server, so the 1433 port (or another) needs to be configured into the SQL Server Configuration Manager.
- Indicate additional database connection properties required to support encryption for
example:
localhost\SQLSERVER;encrypt=true;sslProtocol=TLSv1.2
Make sure the SQL Server certificate is imported in the Java keystore of the service.
- Tokens database name
- Tokens database schema name which you created already as
explained in Create Databases and Database Users. The default is
passtkdb. - Tokens database username
- Tokens database username which you created already as explained
in Create Databases and Database Users. The default is
x3dpasstokens. - Tokens database user's password
- Tokens database user's password.
Note: Note that the SQL Server driver jar is installed automatically. -
On Windows and Linux, if you selected Oracle, enter the Oracle connection parameters:
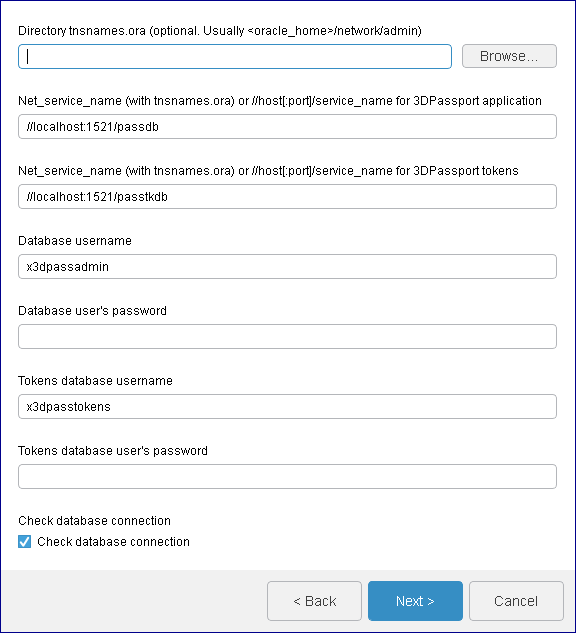
- Directory tnsnames.ora (optional. Usually <oracle_home>/network/admin)
-
Specify the directory containing the tnsnames.ora file. It is usually located in
<Oracle_Home>/network/admin.Note: We recommend that you use the tnsnames.ora file method for specifying database name details. - Net_service_name (with tnsnames.ora) or //host[:port]/service_name for 3DPassport application
-
Database (service) name which you created already as explained in Create Databases and Database Users. There are two options:
- If you did NOT not specify the
tnsnames.ora file path, specify the
name in the following format:
//localhost:1521/passdb. - if you DID specify the
tnsnames.ora file path, specify just
the name:
passdb
- If you did NOT not specify the
tnsnames.ora file path, specify the
name in the following format:
- Net_service_name (with tnsnames.ora) or //host[:port]/service_name for 3DPassport tokens
-
Tokens database (service) name which you created already as explained in Create Databases and Database Users. There are two options:
- If you did NOT not specify the
tnsnames.ora file path, specify the
name in the following format:
//localhost:1521/passtkdb. - if you DID specify the
tnsnames.ora file path, specify just
the name:
passtkdb
- If you did NOT not specify the
tnsnames.ora file path, specify the
name in the following format:
- Database username
- Database username which you created already as explained in Create Databases and Database Users. The default is
x3dpassadmin. - Database user's password
- Database user's password.
- Tokens database username
- Tokens database user name which you created already as explained in Create Databases and Database Users. The default is
x3dpasstokens. - Tokens database user's password
- Token database user password.
Note: Note that the Oracle driver jar is installed automatically.
Whichever database you are using, check the
Check database connectionoption to perform a connection test with the database when clicking Next.Click Next.
-
-
Configure the administrator details.
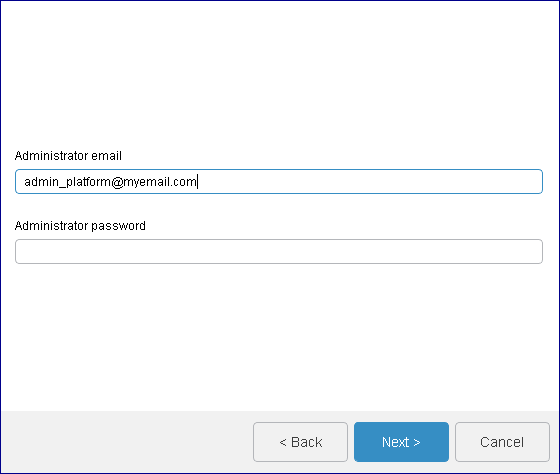
Enter the following information:
- the email address of the sender of emails sent by the
application; the default is
admin_platform@myemail.com. The email address should be a valid address if you want to receive notifications. - the password of the
admin_platformuser. The following default rules apply for the password syntax:- must not contain your username (admin_platform (case insensitive)),
- must not contain your first name (
Admin(case insensitive)) - must not contain your last name (
Platform(case insensitive)) - must be at least eight characters long
- must contain at least one digit
- must contain at least one letter
- must contain at least one uppercase alphabetical character
- must contain at least one lowercase alphabetical character.
Password validity is checked against password policy rules. If you do not observe the rules, a dialog box reminding you of the password policy will be displayed, giving you the opportunity to enter a valid password.
The
admin_platformuser, created automatically during the 3DPassport installation, is the user that will have all the permissions to manage your application configuration.This user is not only the 3DPassport administrator but also by default the administrator for all other services.
The creation of the administrator user on 3DPassport happens during the first start of the web application. When installing a hot fix, if the web application was never started previously, the administrator's password entered during hot fix installation will override the values set by previous installation. Once the web application has been started, the administrator's password entered on the next hot fix installation will be ignored and modification of the administrator's password can only be done from 3DPassport.
Note: If you are migrating from a previous release, when installing 3DSpace later you can decide to keep your previous admin user. If your previous admin user is not present in a3DSpace repository connected to 3DPassport (LDAP, AD,...) and you did not migrate it from your instance (as all other users), you need to create it in 3DPassport. Your current admin user is then considered administrator in 3DSpace, 3DDashboard, 3DSwym and 3DPassport. In this case, theadmin_platformuser is no longer needed (and you should not assign a license to it).Click Next.
- the email address of the sender of emails sent by the
application; the default is
-
Specify the service endpoints (enter the URL of the different
services).
Note: Do not use uppercase characters in the URLs (standard form specified in RFC3986)
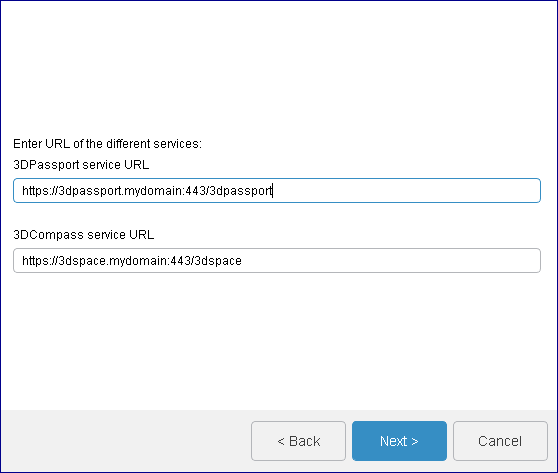
Before you do so, check the following:
- the URLs must contain Fully Qualified Domain Names (FQDN)
- the URLs must start with
https://(and not ftp or other) - 3DPassport must have a root URI if you install all the services on the same machine using the same port
- 3DSpace (3DCompass) has a root URI.
If you are installing the services on the same machine using same port, each service requires a different rootURI.
Sample URLs (if the services are installed on different machines) are:
- 3DPassport
service URL: the default is
https://3dpassport.mydomain:443/3dpassport, where3dpassportis the default webapp name; the installer will obtain the SSL port and the webapp name for the 3DPassport (the default is3dpassport) and update the 3DPassport and the Apache reverse proxy configuration accordingly - 3DCompass
service URL: the default is
https://3dspace.mydomain:443/3dspace: this URL will be added to the notification URL to ping when a user is created and/or updated.
The license control service URL (default is:
https://dsls.mydomain:4085) will only appear if the DSLicSrv.txt file is not present in C:\ProgramData\DassaultSystemes\Licenses (Windows) or /var/DassaultSystemes/Licenses (Linux). The DSLicSrv.txt file will then be created in the correct location, and will contain, for example:dsls.mydomain:4085. The user performing the installation must have write access to the directory containing the file.Click Next.
-
Configure the mail server.
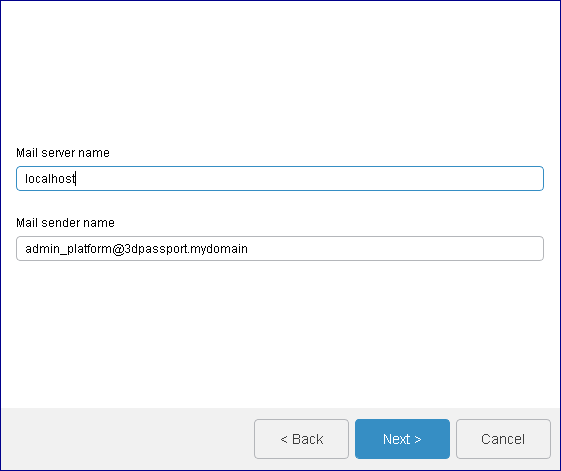
Enter the following information:
Mail server name: the default islocalhost; in this case, local system should be configured to be capable of sending e-mails with enterprise-specific configurationMail sender name: the email address of the sender of emails sent by the application; the default isadmin_platform@3dpassport.mydomainbut you can use another email. The mail sender name is used for password recovery (not available for user passwords if connected to enterprise SSO/LDAP), and notifications on security (if activated).
Click Next.
-
Review your installation choices, then click Install
to install the files.
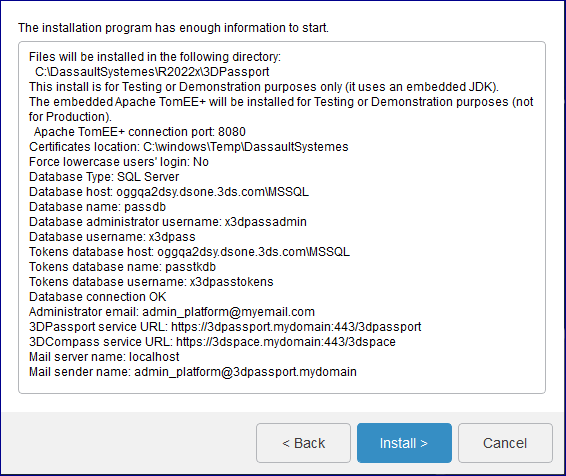
You can consult the installation logs here:
- <3DPassportInstallPath>\InstallData\log on Windows
- <3DPassportInstallPath>/InstallData/log on Linux.
Installation log files are prefixed by the installation media name.
You should also consider the following logs for debugging or analyzing:
- Apache Httpd: defaults to <ApacheInstallDir>\logs\* on Windows, <ApacheInstallDir>/logs/* on Linux
- embedded TomEE+ default log directory:
<3DPassportInstallPath>\win_b64\code\tomee\logs on Windows
<3DPassportInstallPath>/linux_a64/code/tomee/logs on Linux
- external Apache TomEE+ default log directory:
<externalTomEEInstallPath>\logs on Windows
<externalTomEEInstallPath>/logs on Linux.
If the installation was successful, proceed to Operations.