-
From the Ambience Studio section of the action bar, click Display Library
Panel
 . .
-
Whatever the option you are defining, use the slider at the bottom
to enlarge or reduce the size of the thumbnails displayed in the panel.
- Optional:
Click Add Collection, and then navigate to the user
collection to be used.
A new User Collection area is displayed in the panel. Repeat this step
as many times as required to add other collections.
-
To specify an item as favorite, right-click the corresponding thumbnail then
select Add to favorites.
The selected thumbnail is displayed in the Favorites area and you can
then double-click it to update the scene and the ambience panel. Note:
Favorites and User Collections areas are specific to the current category.
This means that you can have different collections and different favorites
for both categories.
-
In the list on top of the panel, click Maps 360 to
activate a new 360° HDR image.
-
Drag the image of your choice to the work area, or double-click it.
-
In the Load Ambience dialog box, select the appropriate
option.
| Option | Description |
|---|
| Import all parameters |
Imports all the default parameters of the selected
thumbnail. |
| Selective import |
Lets you individually select the parameters to import. |
| Do not import any parameter |
No parameter is imported, only the HDR image. |
| Remember my choice |
Lets you retrieve the options you selected next time you access the
dialog box. |
-
Click
OK.
The scene as well as the General and
Ground tabs of the ambience panel are updated
accordingly.
-
In the list on top of the panel, click Backplates to
activate a new backplate.
-
Drag the image of your choice to the work area, or double-click it.
-
In the Import Related Dome dialog box that opens, indicate
if you want to activate the 360° HDR image corresponding to the selected
backplate.
If you click Yes and if the
360° HDR image has been activated, the Load Ambience dialog
box opens (see step 6). The scene and the preview area of the relevant tab
(General for a 360° dome, or
Backplate) in the ambience panel are updated.
-
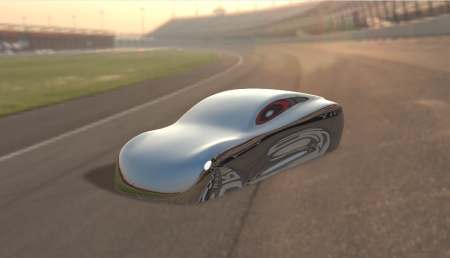
In the list on top of the panel, click 3D Shapes to
insert a predefined 3D shape, and simulate the changes made to the current
ambience.
-
Click an item in the list.
The selected object is inserted in the current ambience.
-
Resize the inserted object using the mouse.
- Hold Ctrl + hold middle-click + drag.
- Hold Ctrl + Page Up
(auto-repeat when pressing and holding down the keys) to zoom in.
- Hold Ctrl + Page Down
(auto-repeat when pressing and holding down the keys) to zoom out.
You can also hold middle-click to change the position of the inserted object.
|
 is displayed on top
of the panel), the Display Library Panel
command directly opens the panel.
is displayed on top
of the panel), the Display Library Panel
command directly opens the panel.  is displayed on top
of the panel), the Display Library Panel
command displays
is displayed on top
of the panel), the Display Library Panel
command displays  on the right side of your session window:
move your mouse over
on the right side of your session window:
move your mouse over  on the right of the expandable area, and
then select Rename. Enter the new name in the
Rename box, and then press
Enter.
on the right of the expandable area, and
then select Rename. Enter the new name in the
Rename box, and then press
Enter.